SHIPPING SETTING GUIDE
You have two ways of setting up your shipping; Simple and Table Rated. We only recommend to use the table rated shipping if you consider yourself tech savvy.
After your first listing has gone live, you have pre approval and you can check that it is working on your live listing.
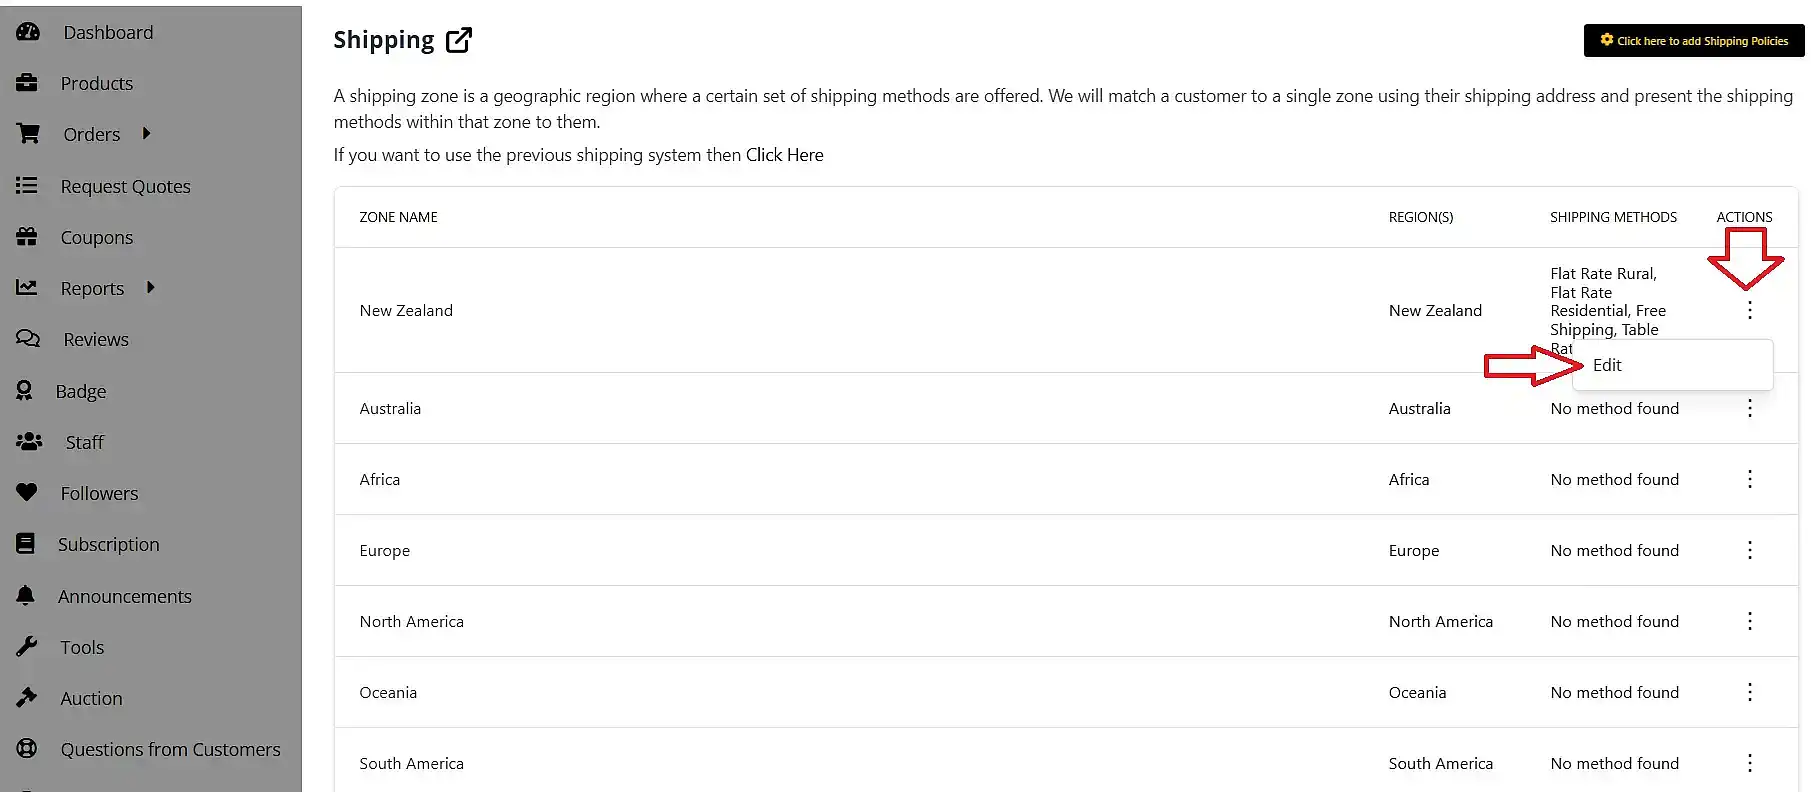
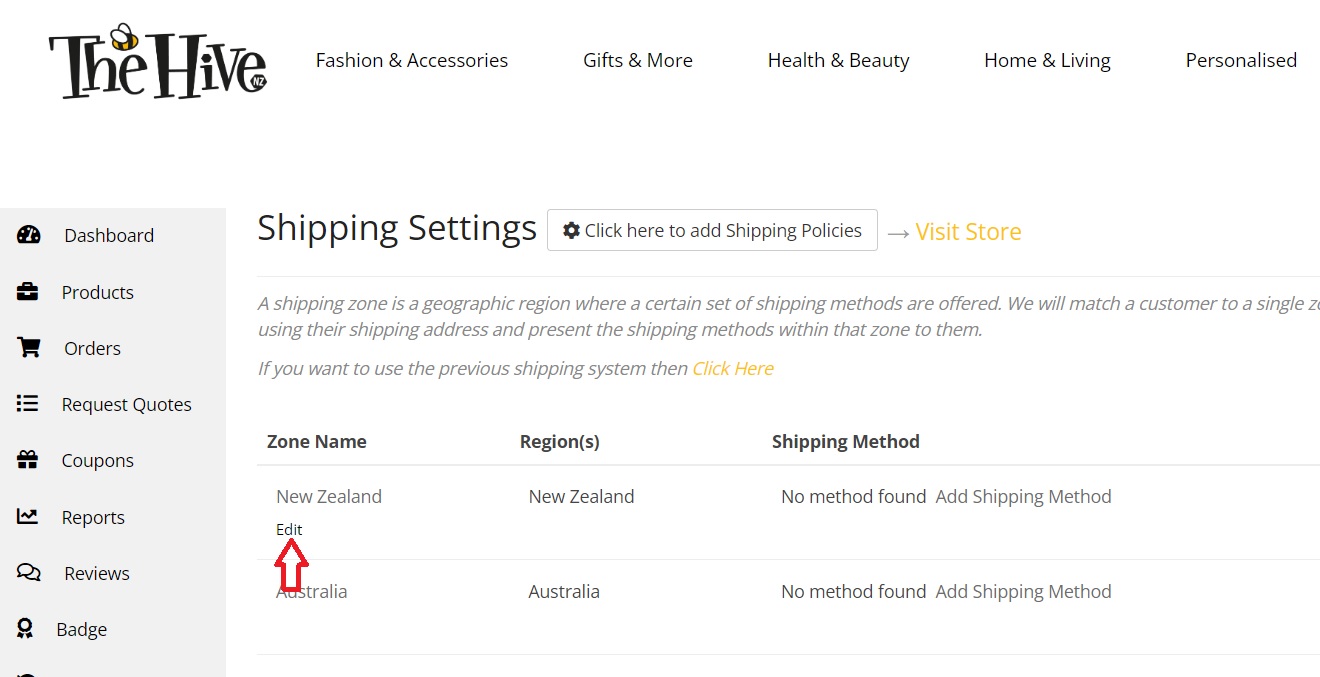
For both options, please start by going to settings>shipping from your vendor dashboard.
Most vendors only need STEP 1 SIMPLE SHIPPING and STEP 2 EDIT YOUR SHIPPING TAB
STEP 1: SIMPLE SHIPPING
- click the 3 dots behind the zone you want to edit – those you don’t edit, will not be available to the customers from those zones.
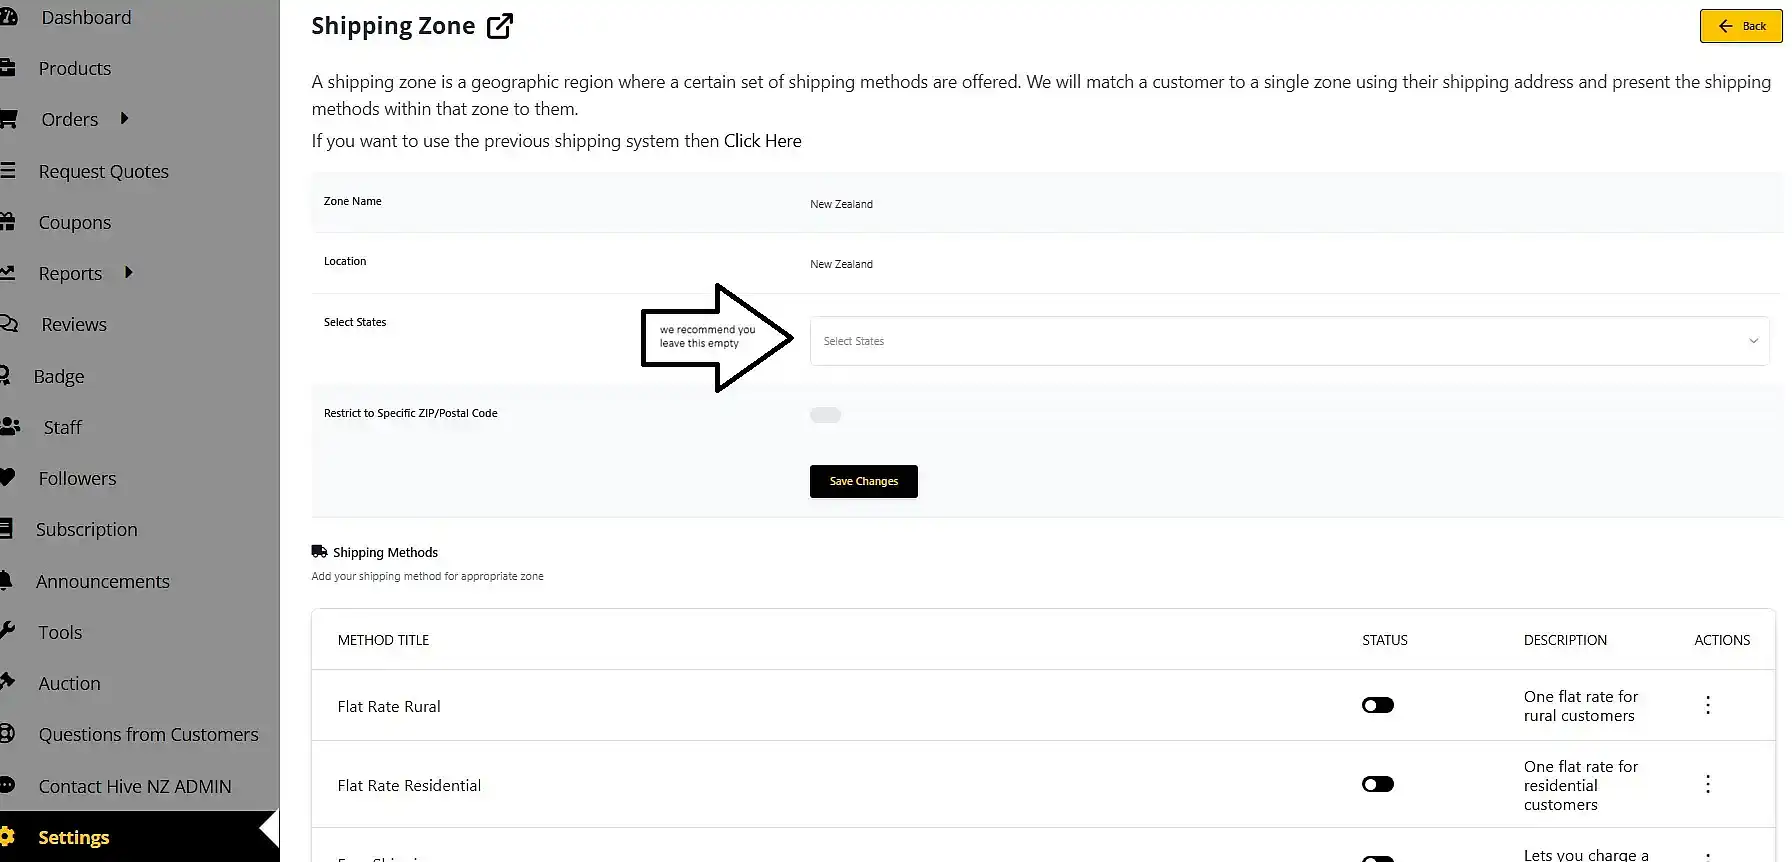
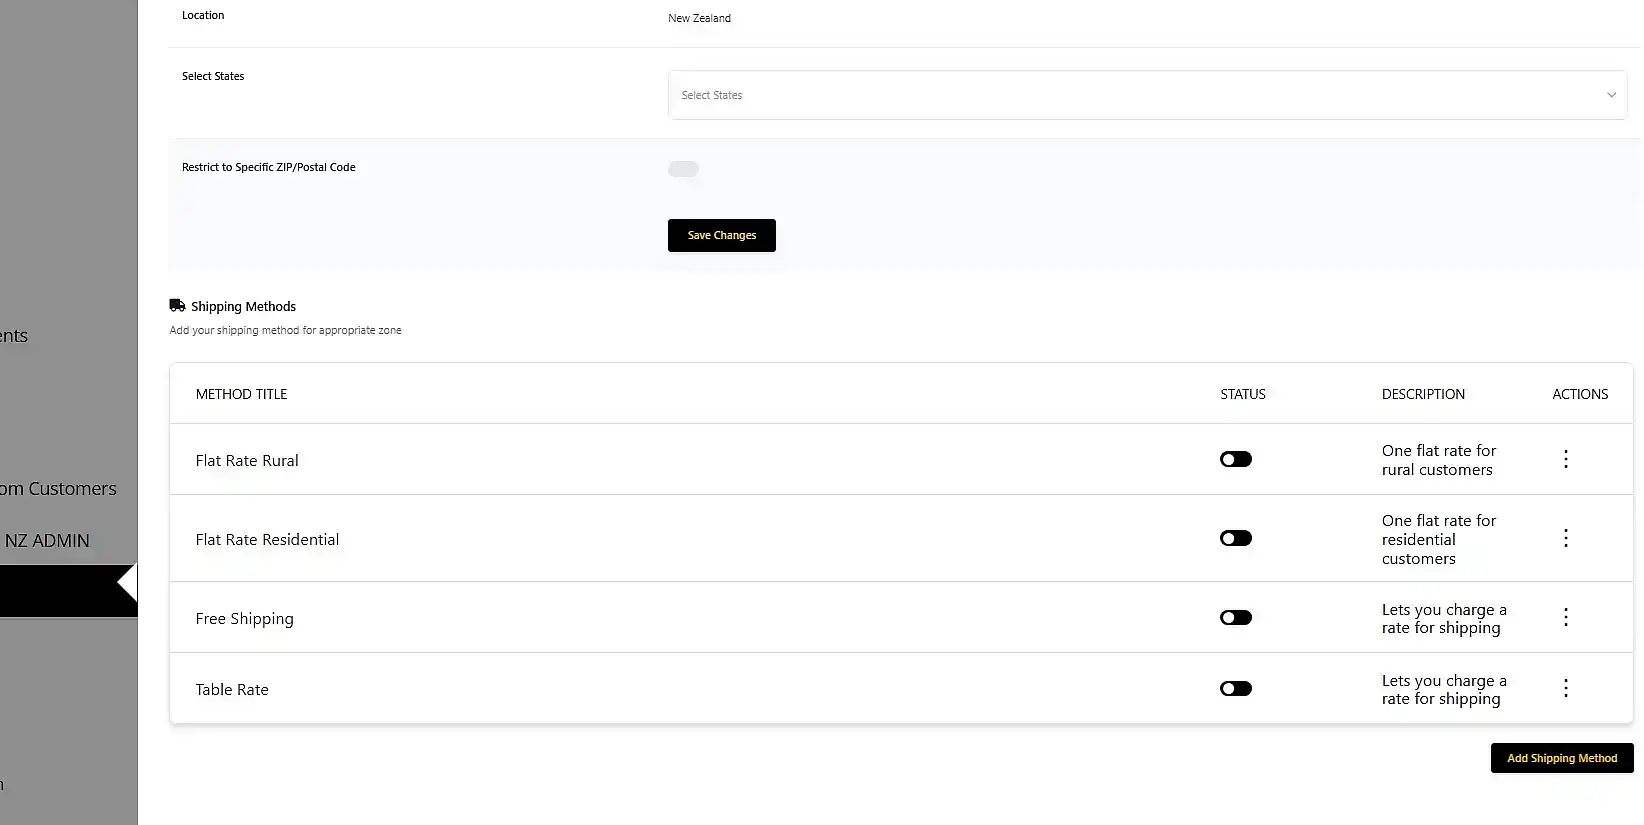
- that opens the below screen – we recommend you leave the ‘select states’ empty, it means it will apply to the whole of nz.
- In these screenshots you will see already set up shipping methods – you will not have any if you haven’t set this up yet.
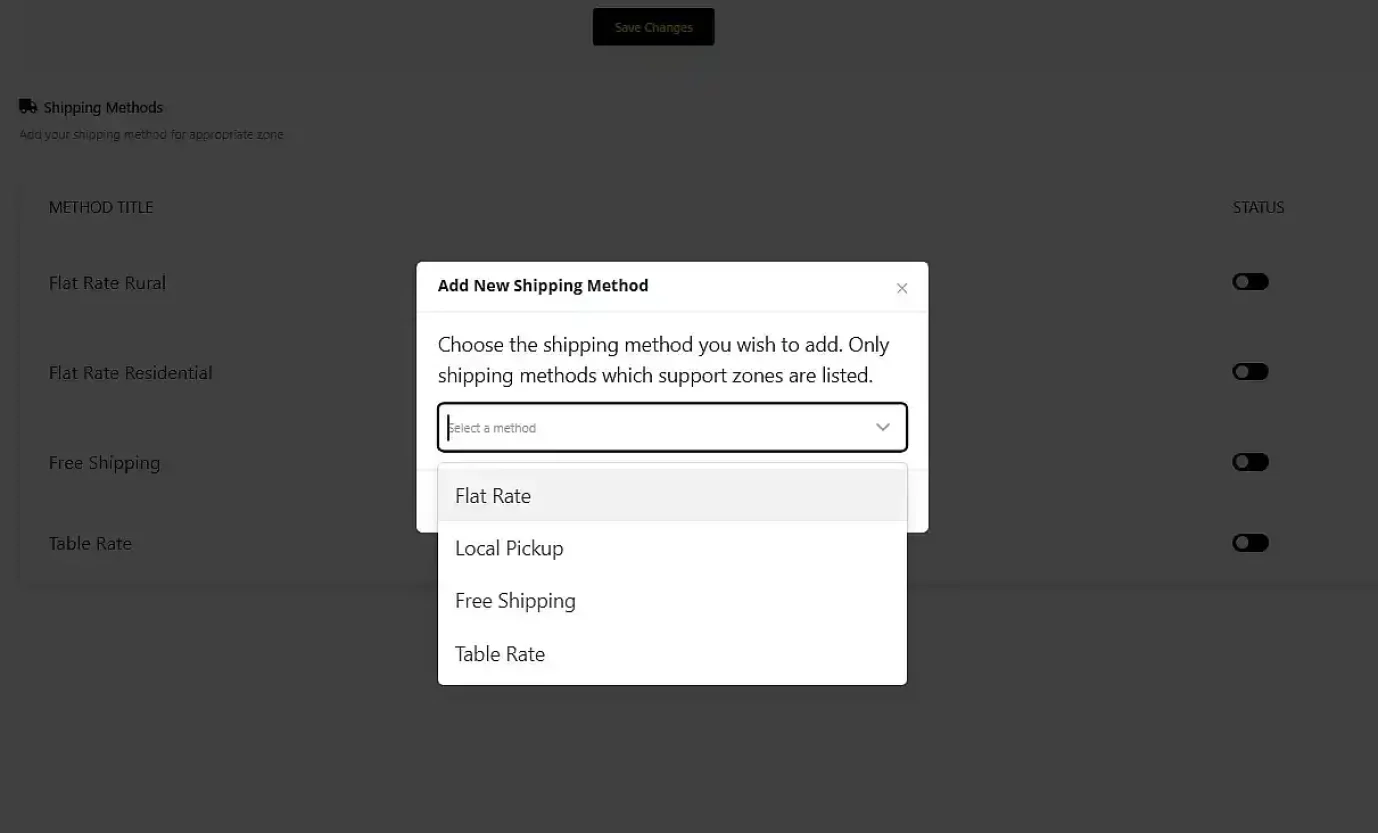
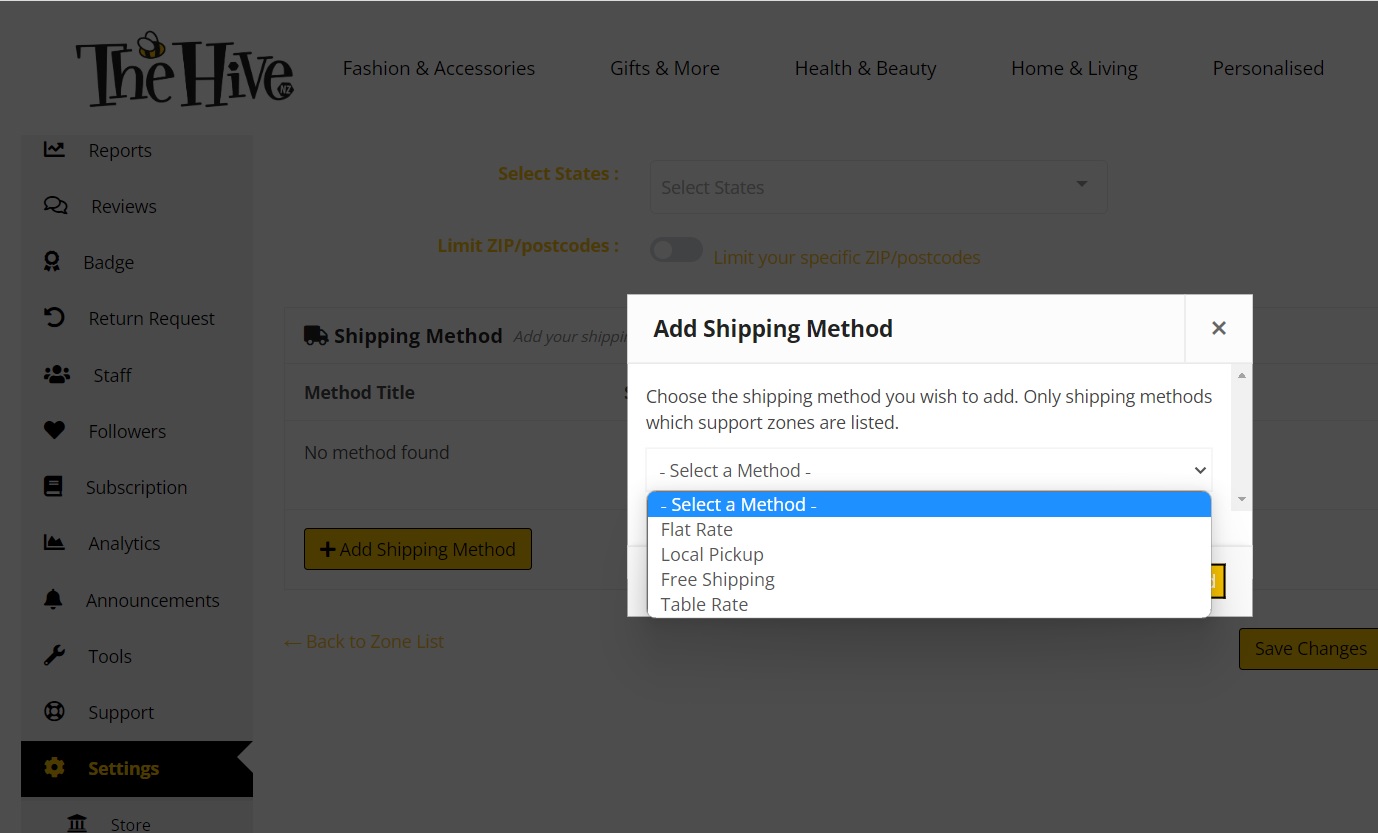
- click ‘add shipping method’ and that opens this pop up.
First, let’s set up ‘flat rate shipping’ but I want a different rate for Rural than I want for Residential. You could set this up for North Island and South Island for example too… up to you.
If you want a flat rate for Rural and a flat rate for residential shipping, then do the below twice:
On the drop down, click “Flat Rate’ and ‘add method’
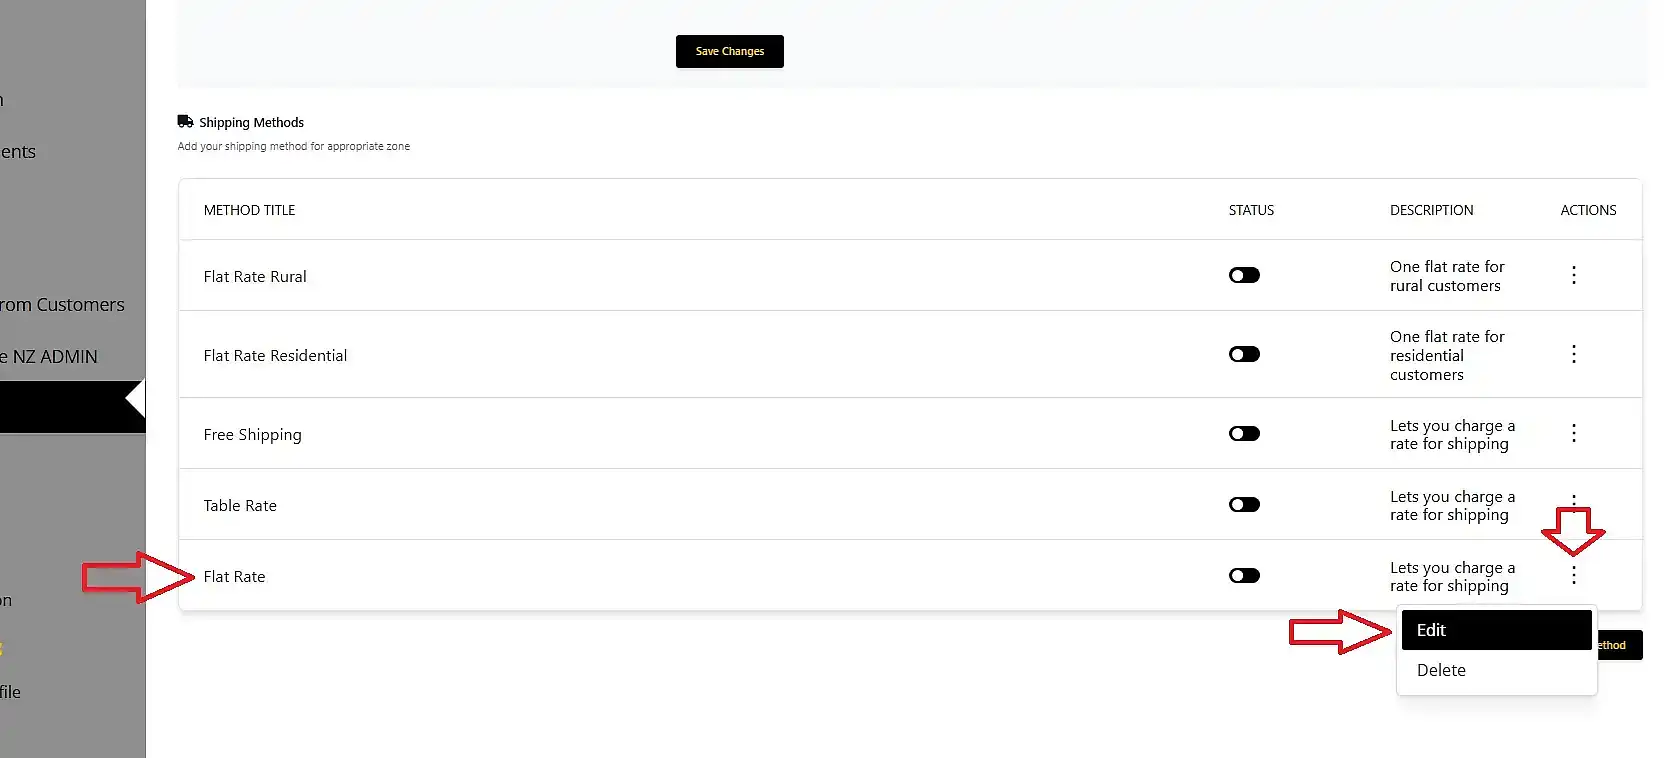
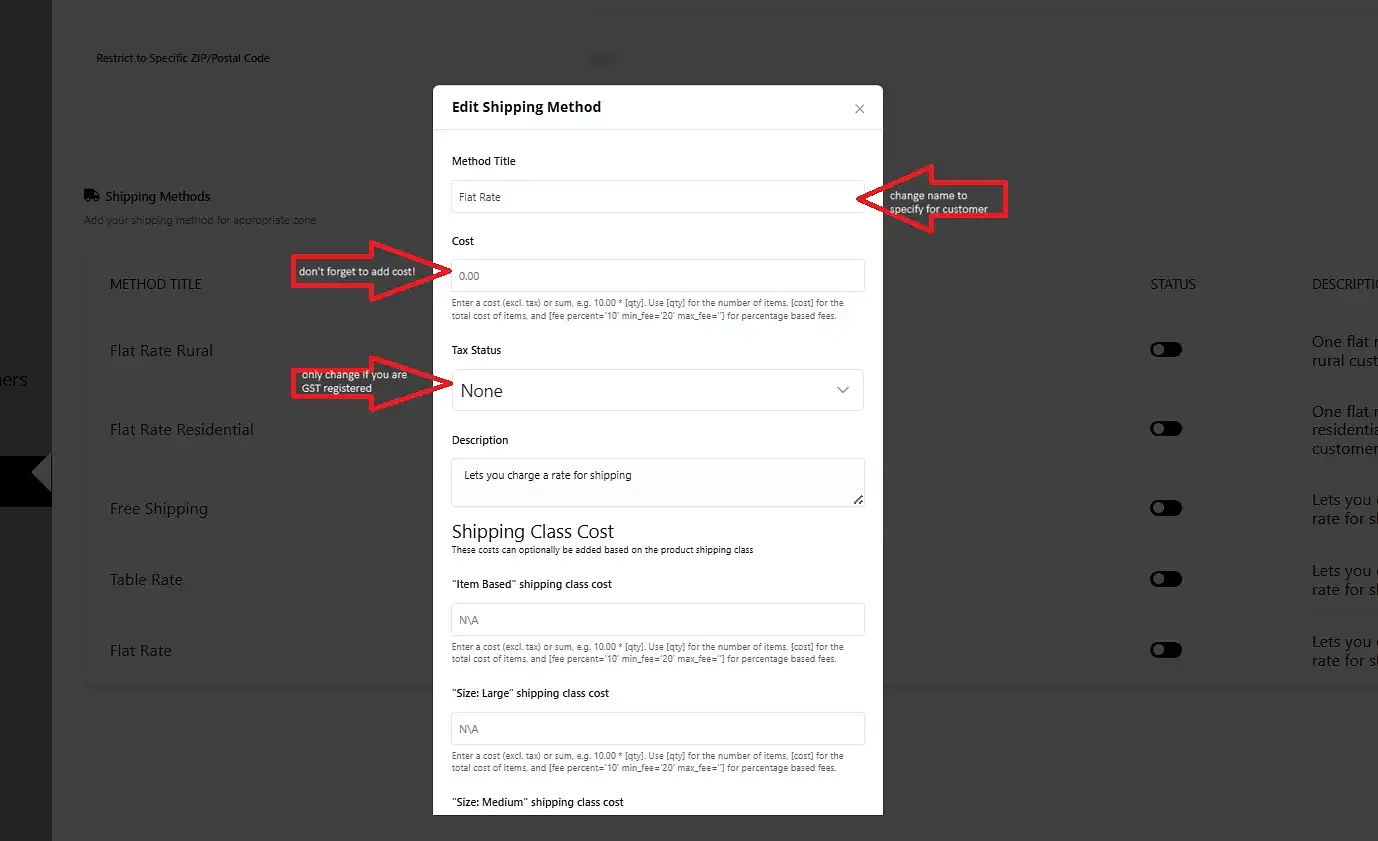
This will open the below (remember, the screenshot shows previously set up ones, you will only see one at a time added)
you can now edit your shipping option.
- Set the name (under title, this can say ‘north island rural’, ‘rural nz wide’, ‘flat rate nz wide’ – it can literally say what you want.
- Set the price for that shipping option
- No need to change anything else (unless you are GST registered, then change the tax status)
- Scroll down to click ‘save method’
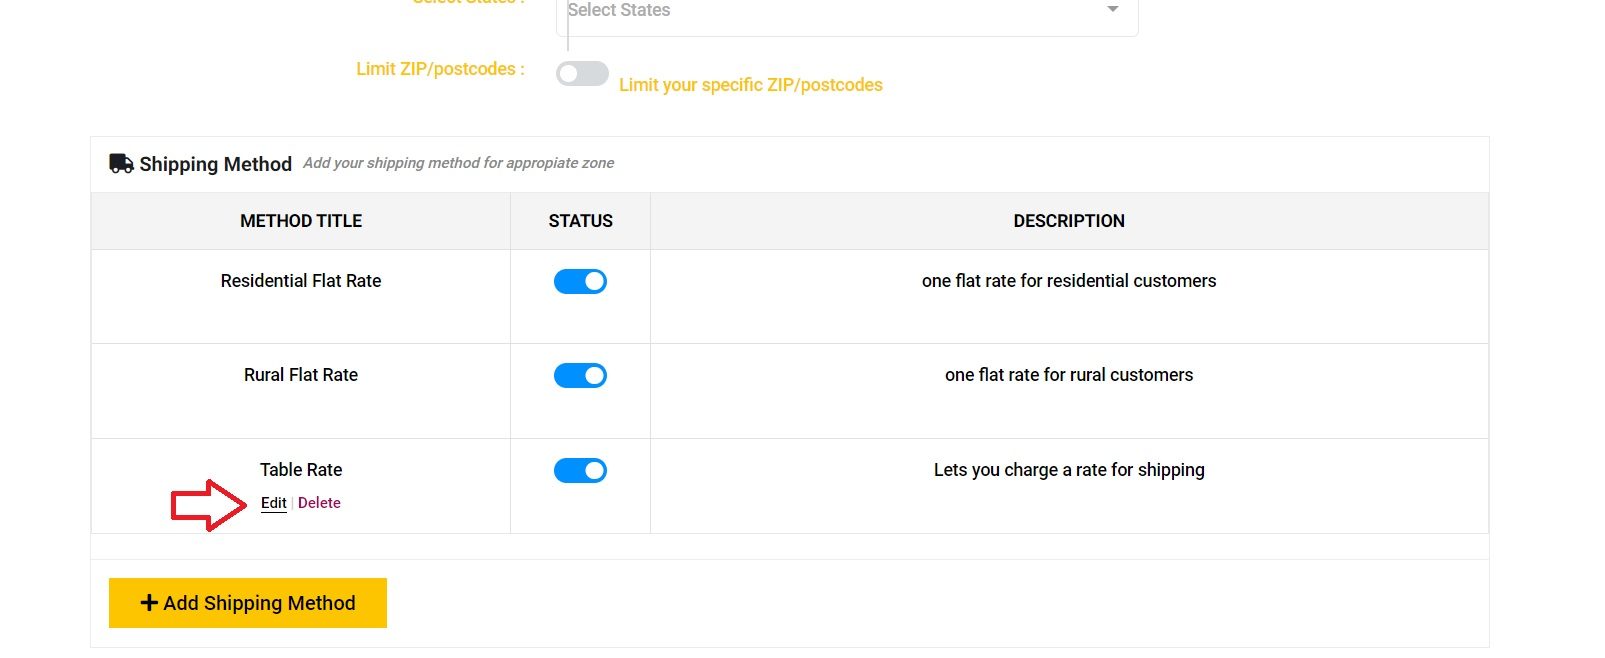
Now your shipping method will show in your list.
You can leave it OR add more to the list.
You can now alsoset up shipping methods for other zones (countries) if you want to.
If you don’t, it just means customers from those zones (countries) will not be able to shop from you.
PLEASE NOTE:
- When using LOCAL PICK UP, please make sure you edit the name of the shipping method, so it includes the general location for pick up, eg; ‘Pick up Hamilton’ , Henderson Auckland Pick Up’ or ‘Nelson Central Pick Up, just to name a few examples.
- We do NOT advise to set up for all the different postcodes and ‘states’ within a zone, it has proven tricky for this to be completely accurate and up-to-date all the time worldwide.
STEP 2: EDIT YOUR SHIPPING TAB ON PRODUCT LISTINGS
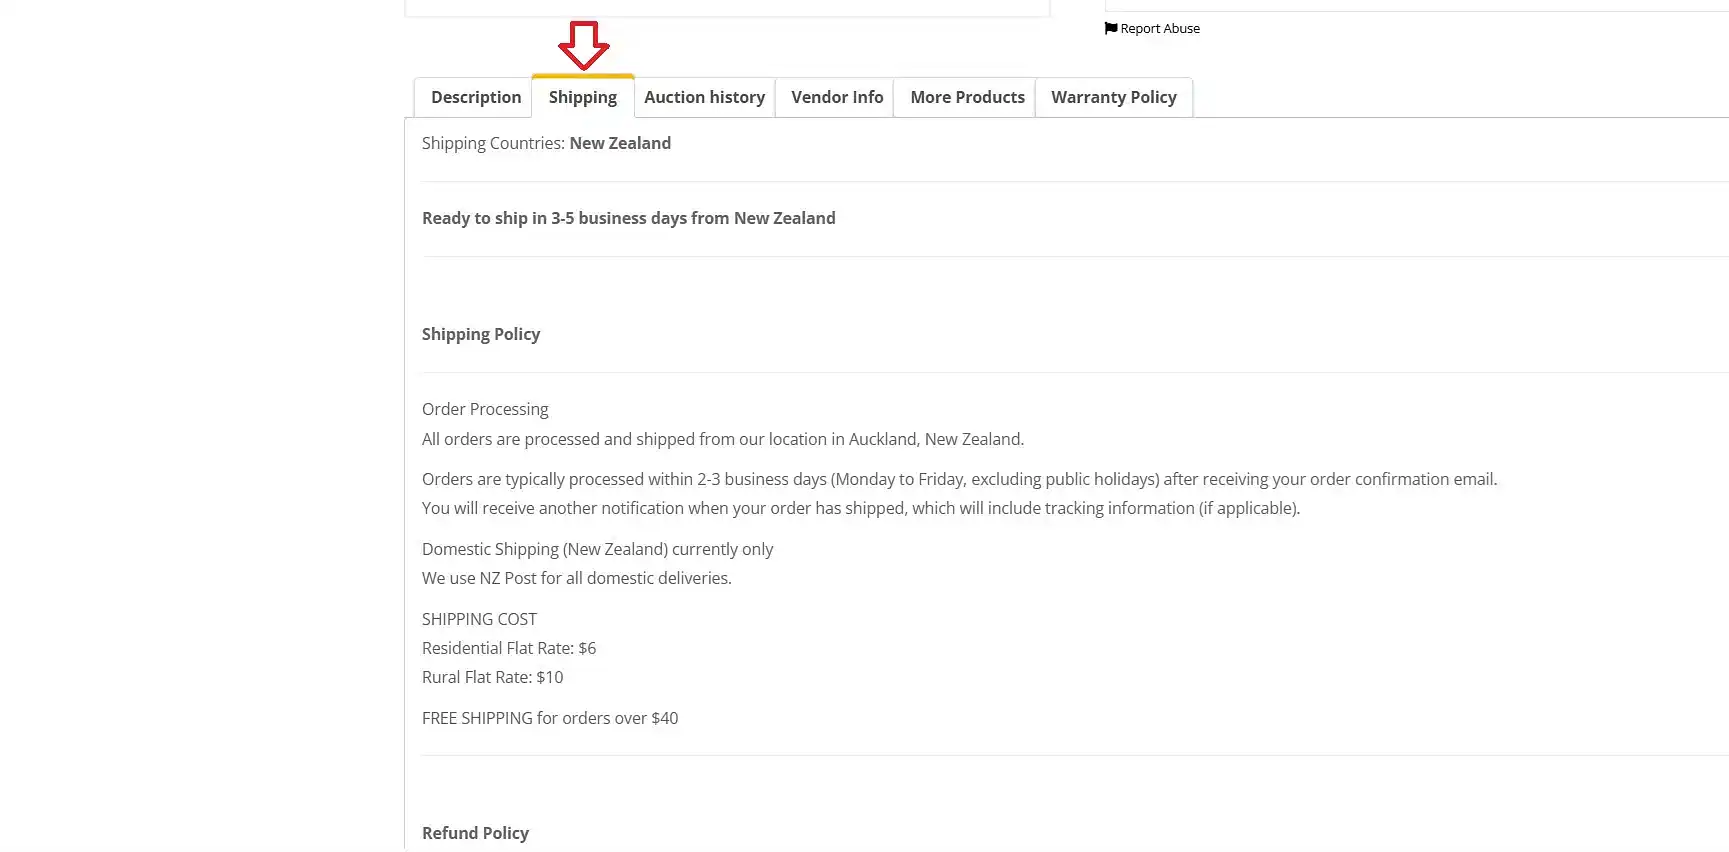
Each product listing shows the shipping tab and you can add information to it.
- where you ship to
- how quickly you ship
- your shipping policy (incl cost)
- your refund policy
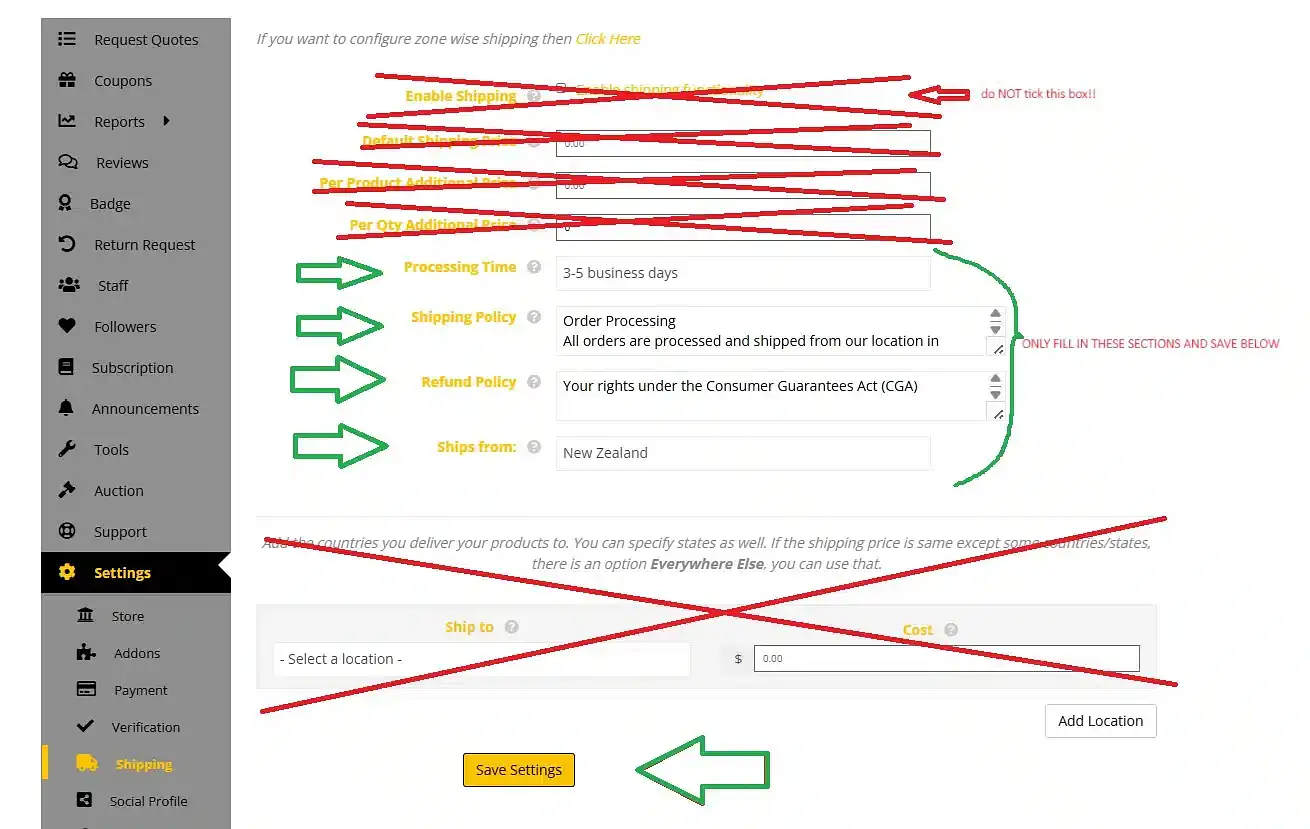
When you edit this, the shipping tab on ALL your products will show the information, As shown here:
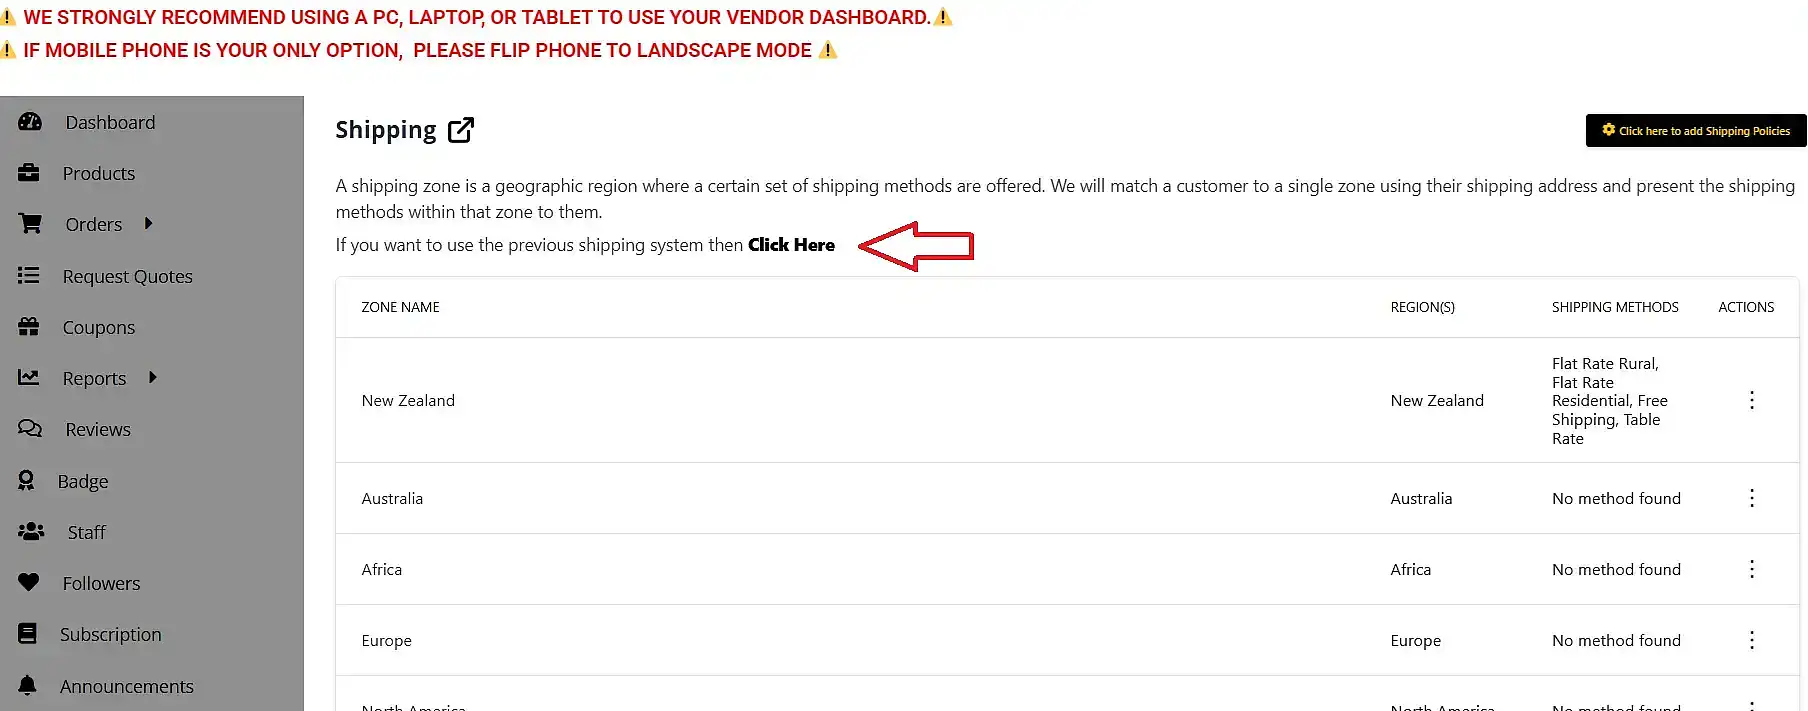
STEP 1: go to your vendor dashboard and the shipping tab.
STEP 2: click to at the top on, If you want to use the previous shipping system then Click Here. As shown below
IT IS VITAL YOU FOLLOW/READ THE RED TEXT AS SHOWN IN THESE IMAGES!
Step 3: Only edit the bits with the green arrow and don’t forget to save!
Not following these instructions may cause customers not be able to order from you.
Specifically the tick box at the top needs to NOT be ticked!!
TABLE RATED SHIPPING
This is ideal when you have different sizes of parcels and it really depends on what the customer orders what the shipping cost is…
One item might have a $5 shipping cost and another item costs $25 to send.
You might need to define the shipping cost based on weight, size or item count, etc.
You CAN with table rated shipping also set up rural/residential but as with our simple shipping; the customer chooses and needs to choose correctly… the system does not ‘see’ whether the customer is rural or not UNLESS you put different things in for different postcode zones.
below step by step as well as some example screenshots and meaning of terminology used.
Please use our simple shipping set up if all you need is rural/residential/flat rate/free shipping/local pick up etc.
Pick the zone you want to set up table rated shipping for and click ‘edit’
Click to add a shipping method and choose ‘Table Rated’
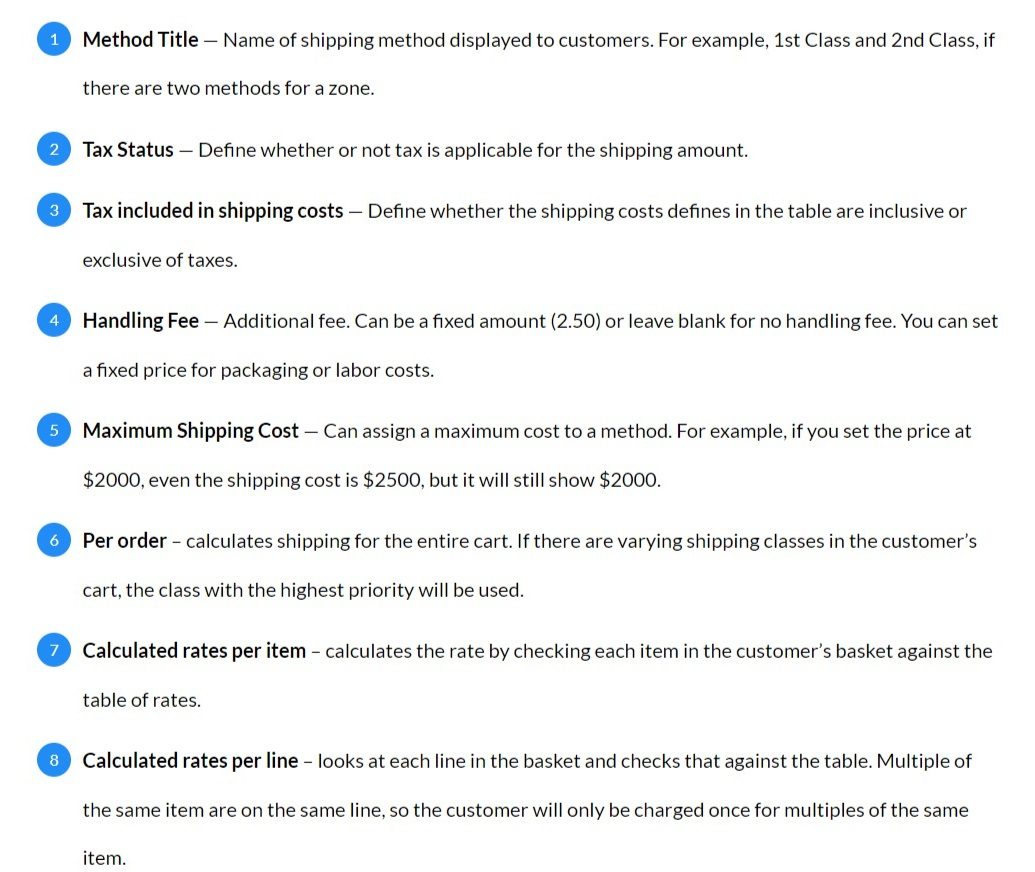
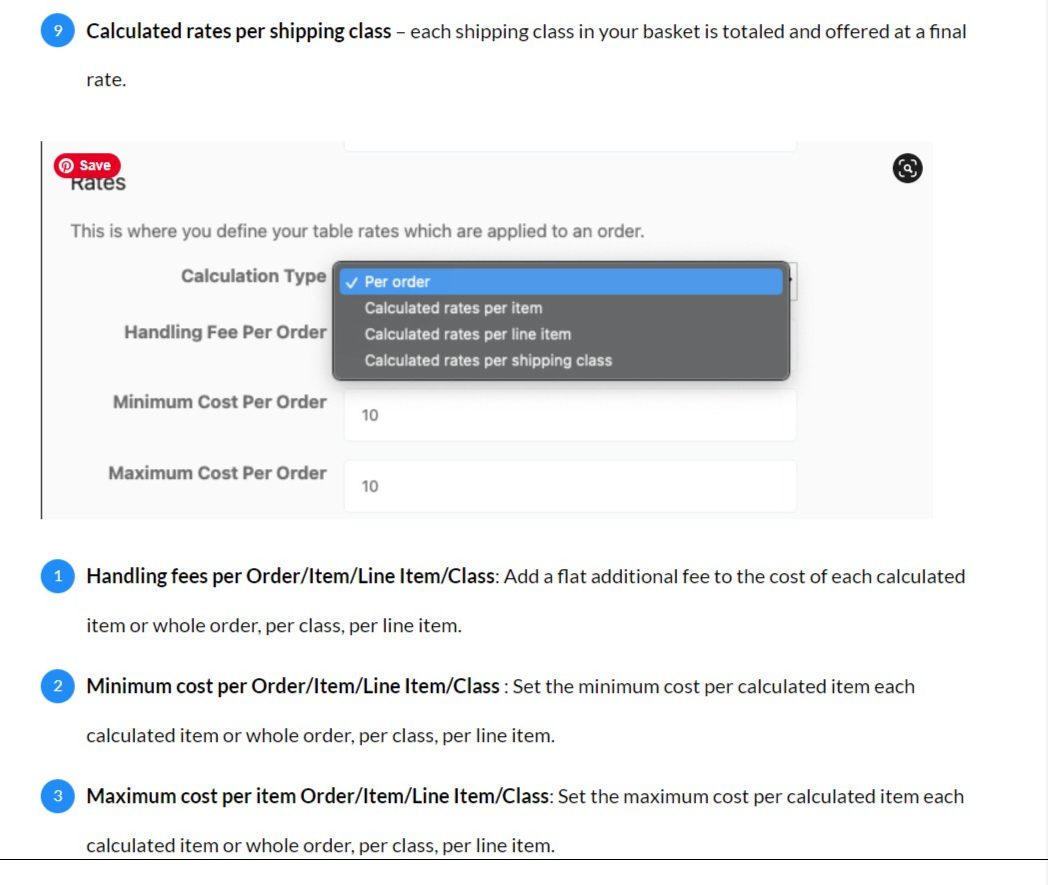
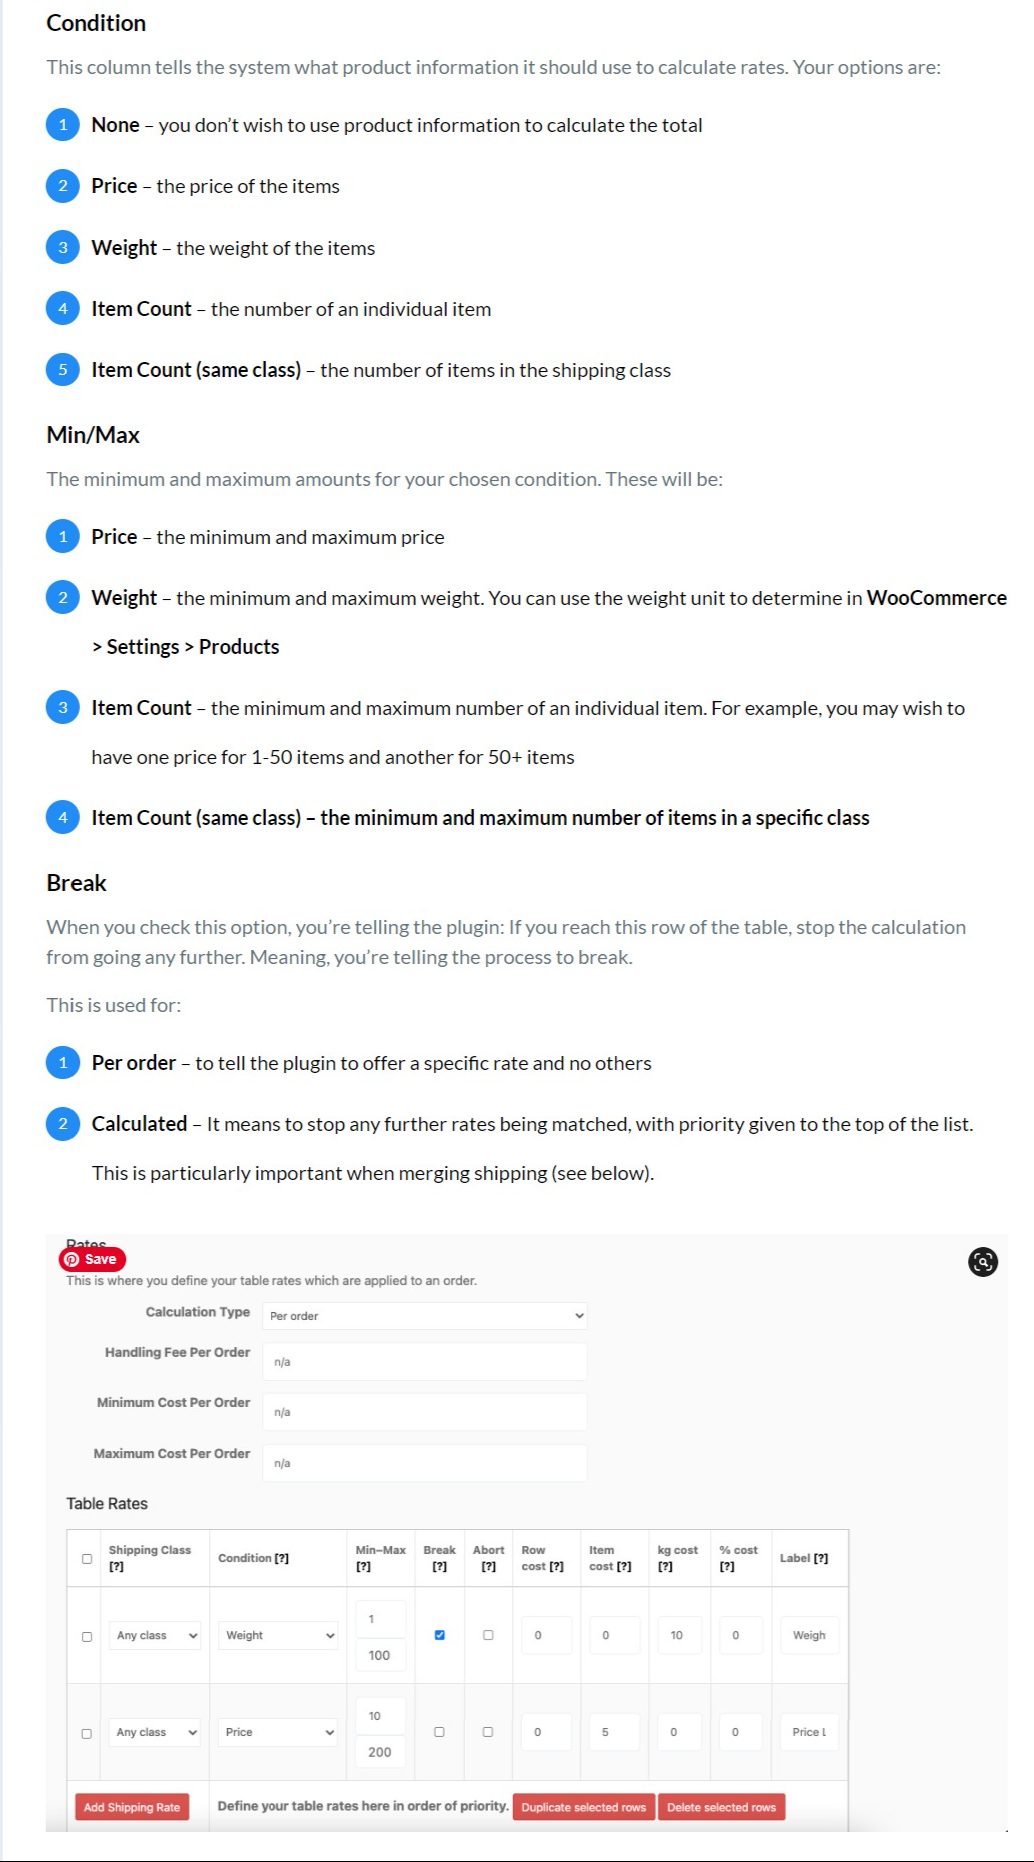
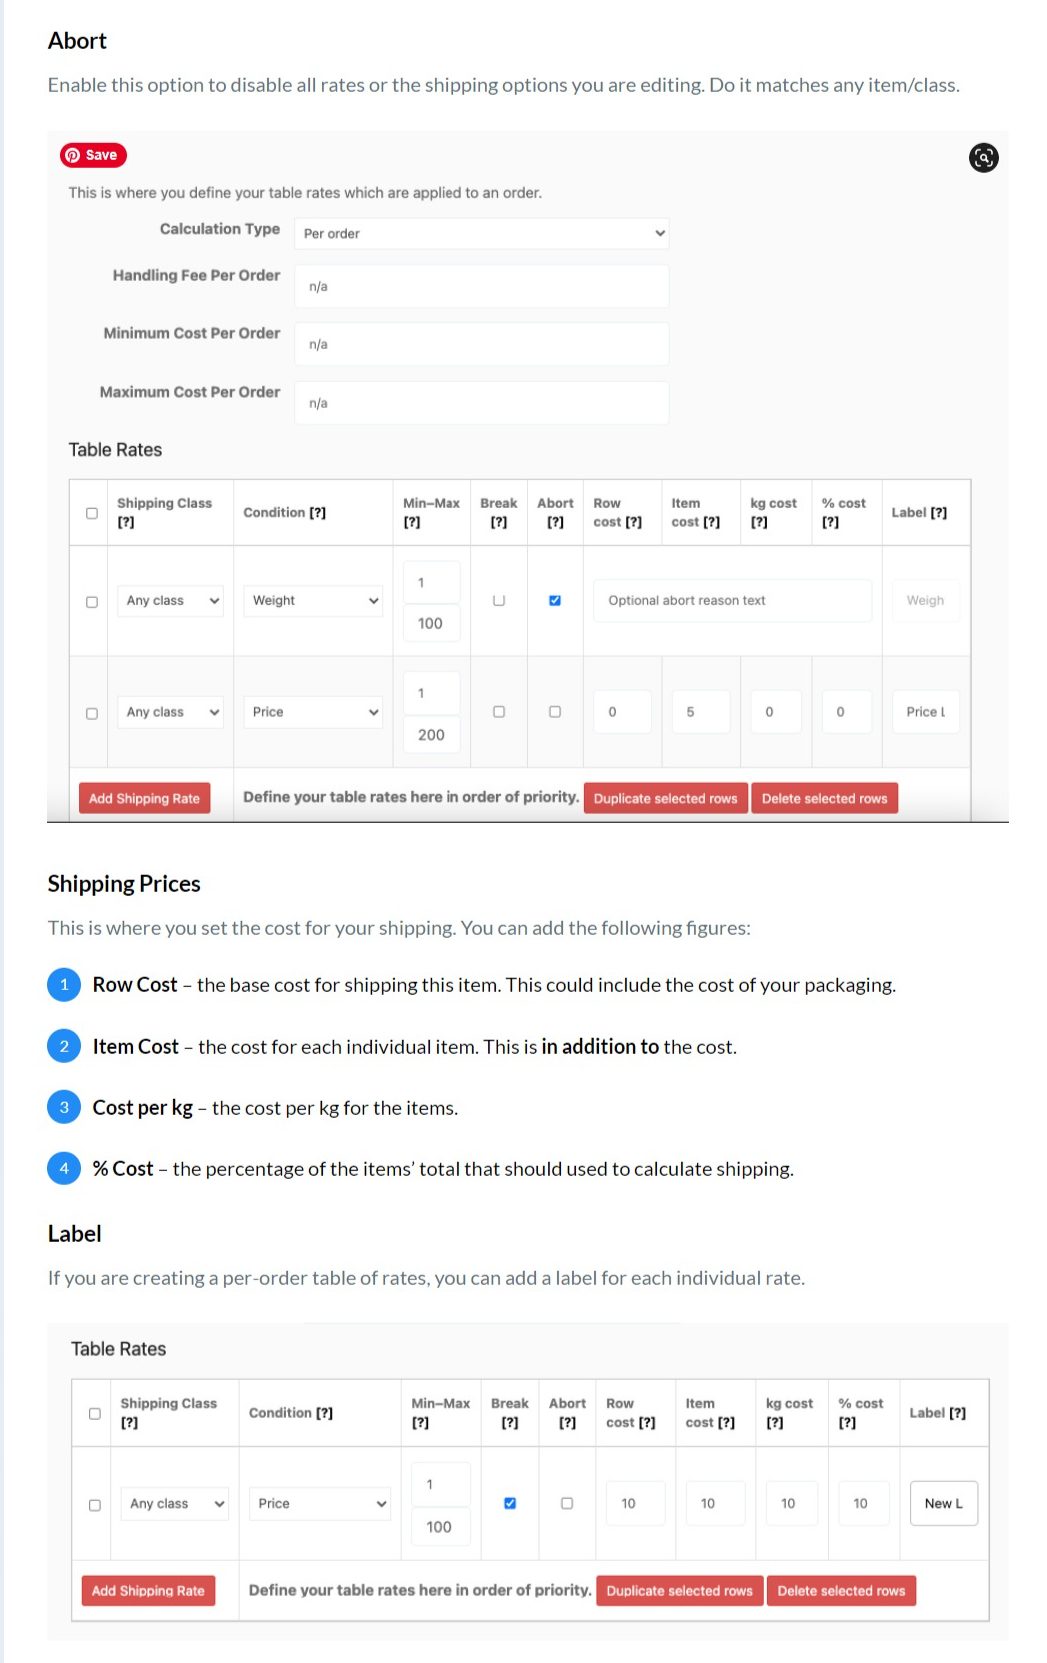
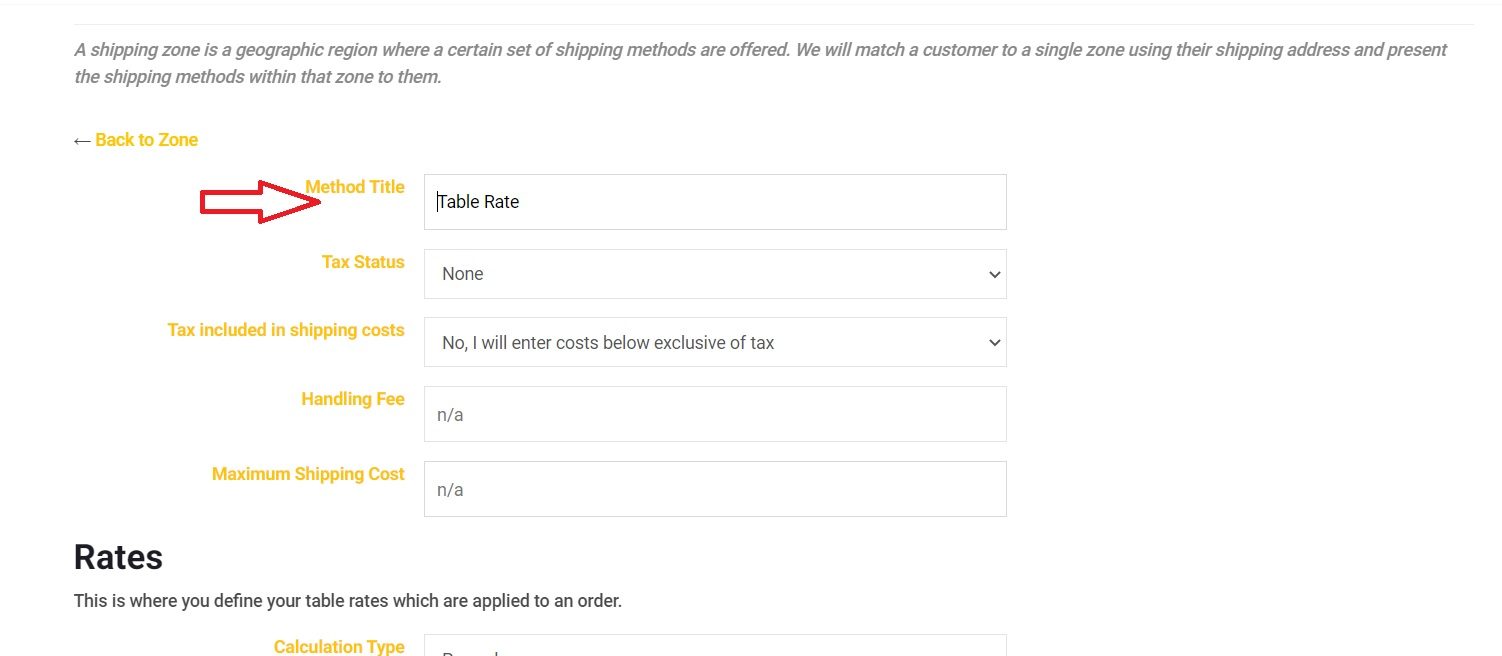
you’ll see lots of terms on the screen and here is what they mean
click ‘add shipping method’
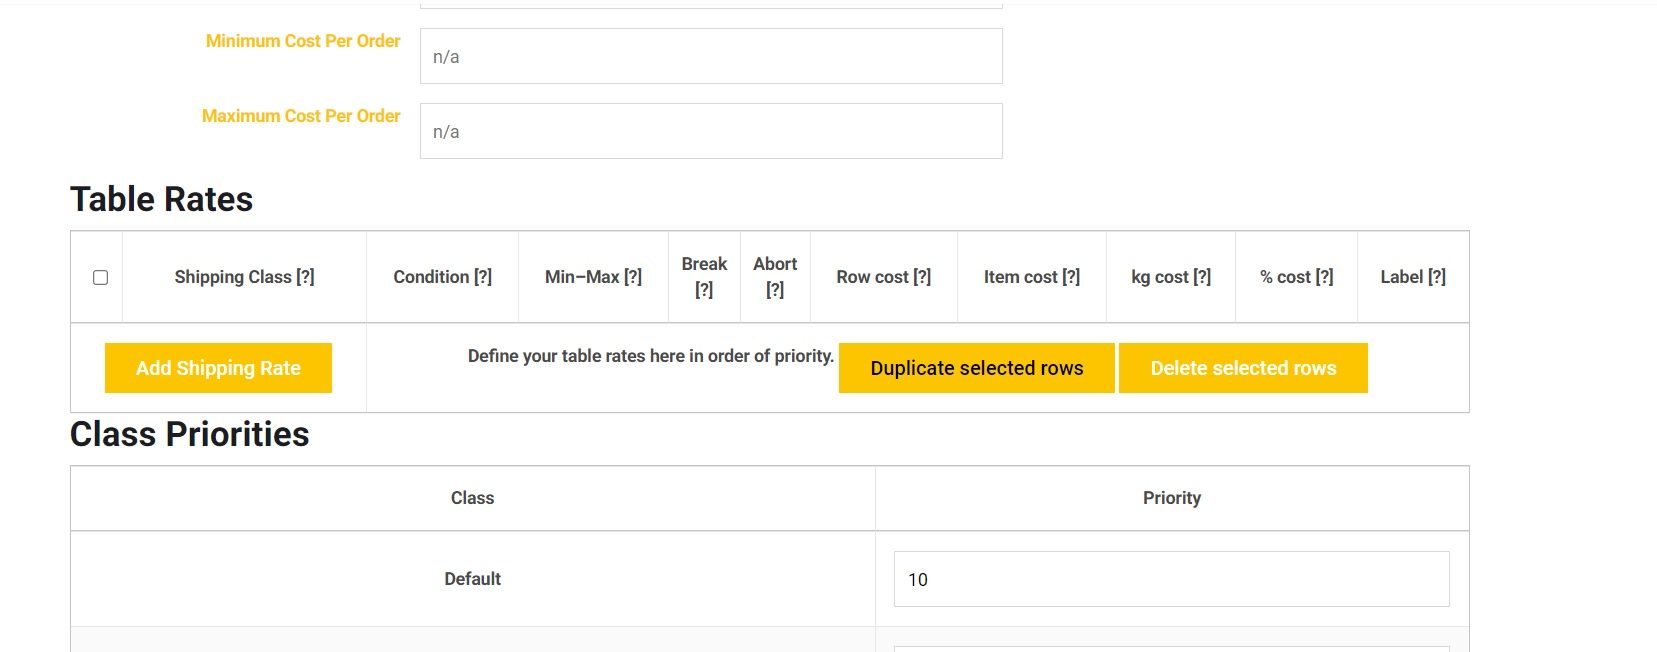
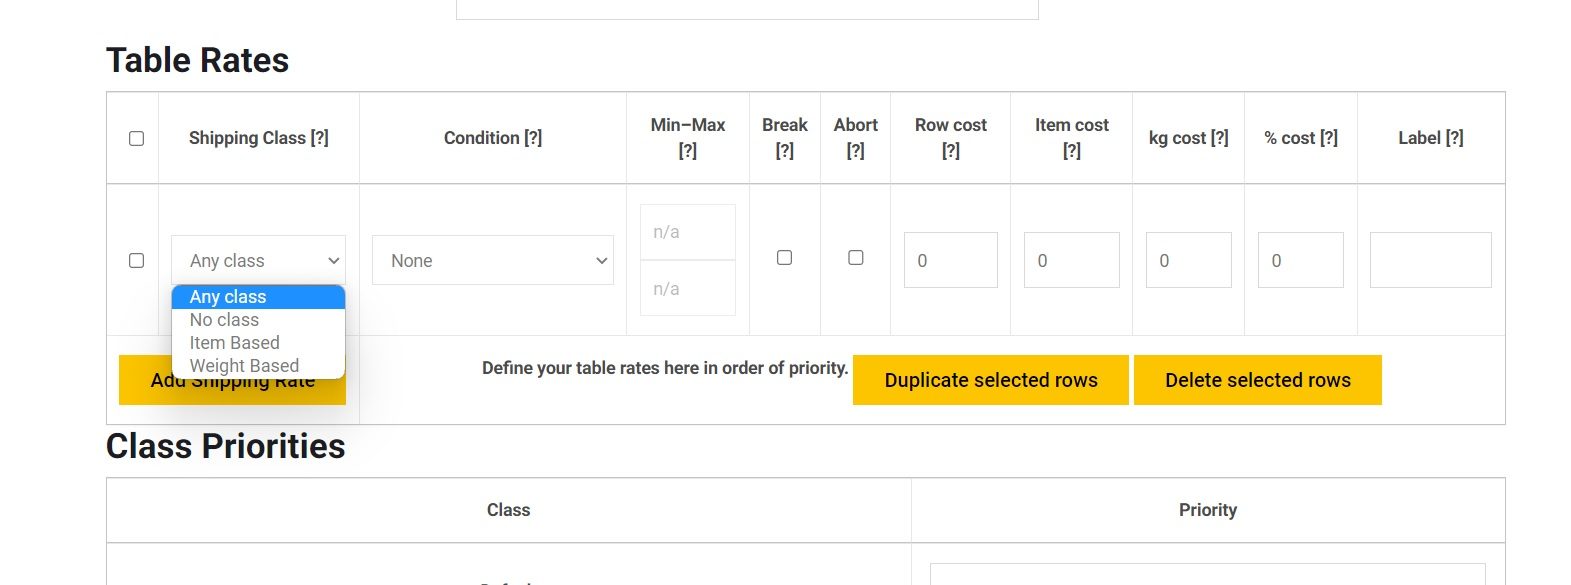
edit the table depending on what you want it to do – don’t forget; when you use weight based for example, don’t forget to edit your listings and give your item a weight!!
What the words on the table mean:
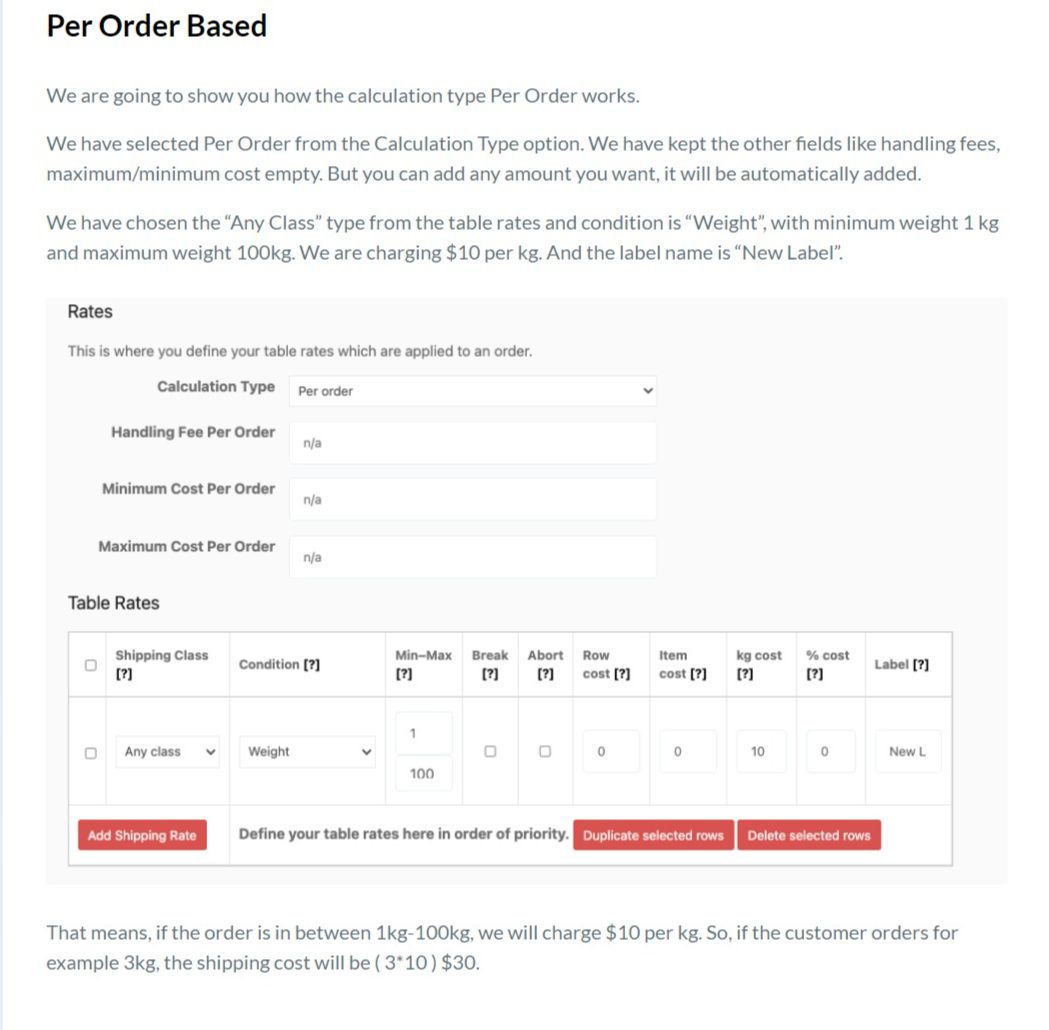
what it looks like when you use ‘per order based’:
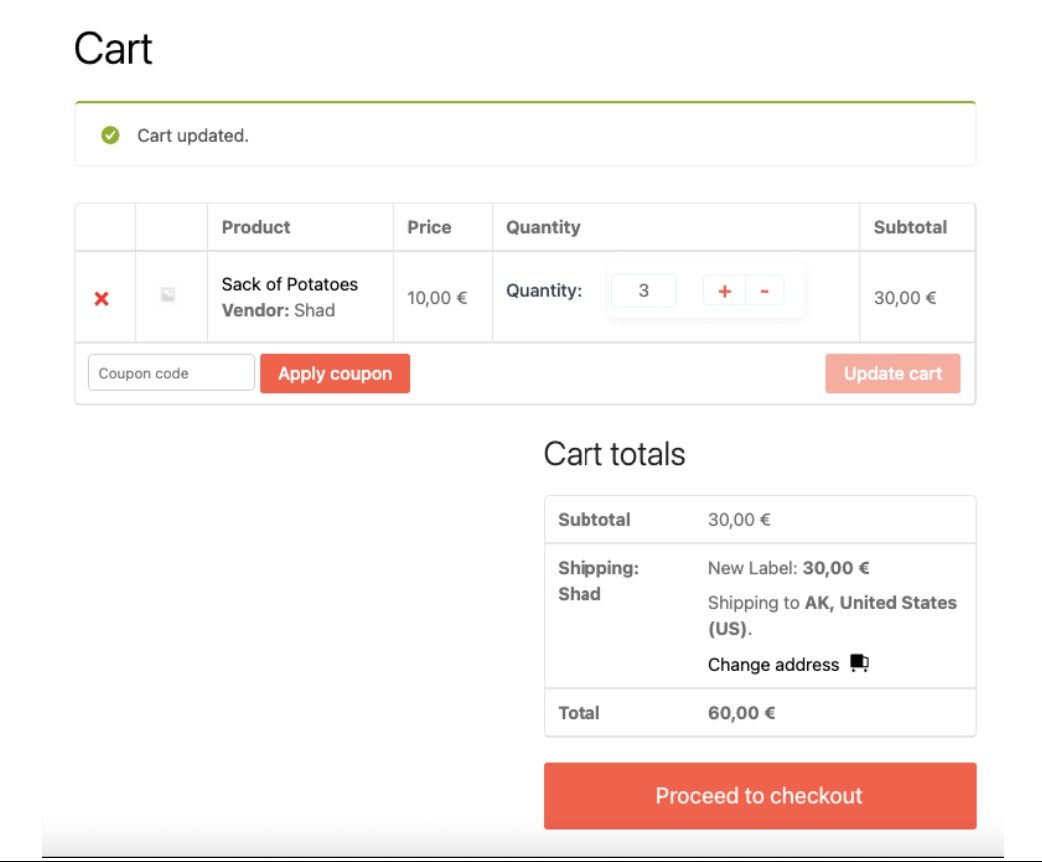
per order based as set up above when checked out by customer
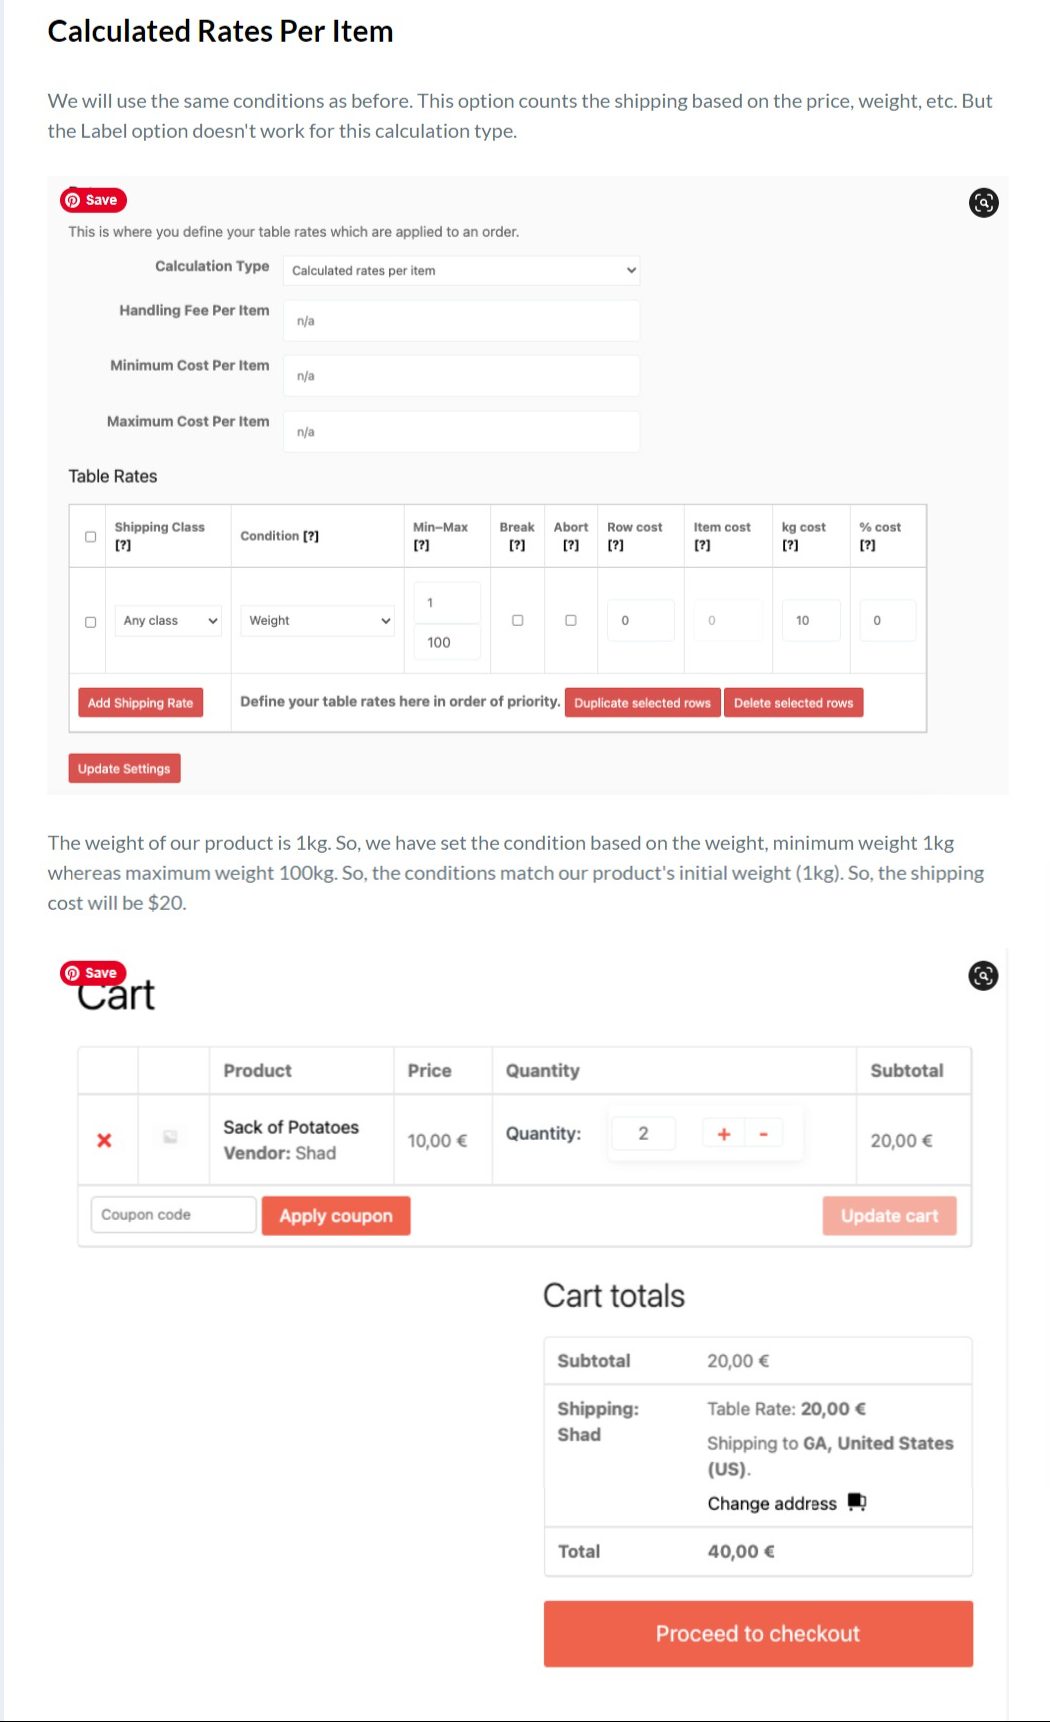
when ‘per item based’ is used:
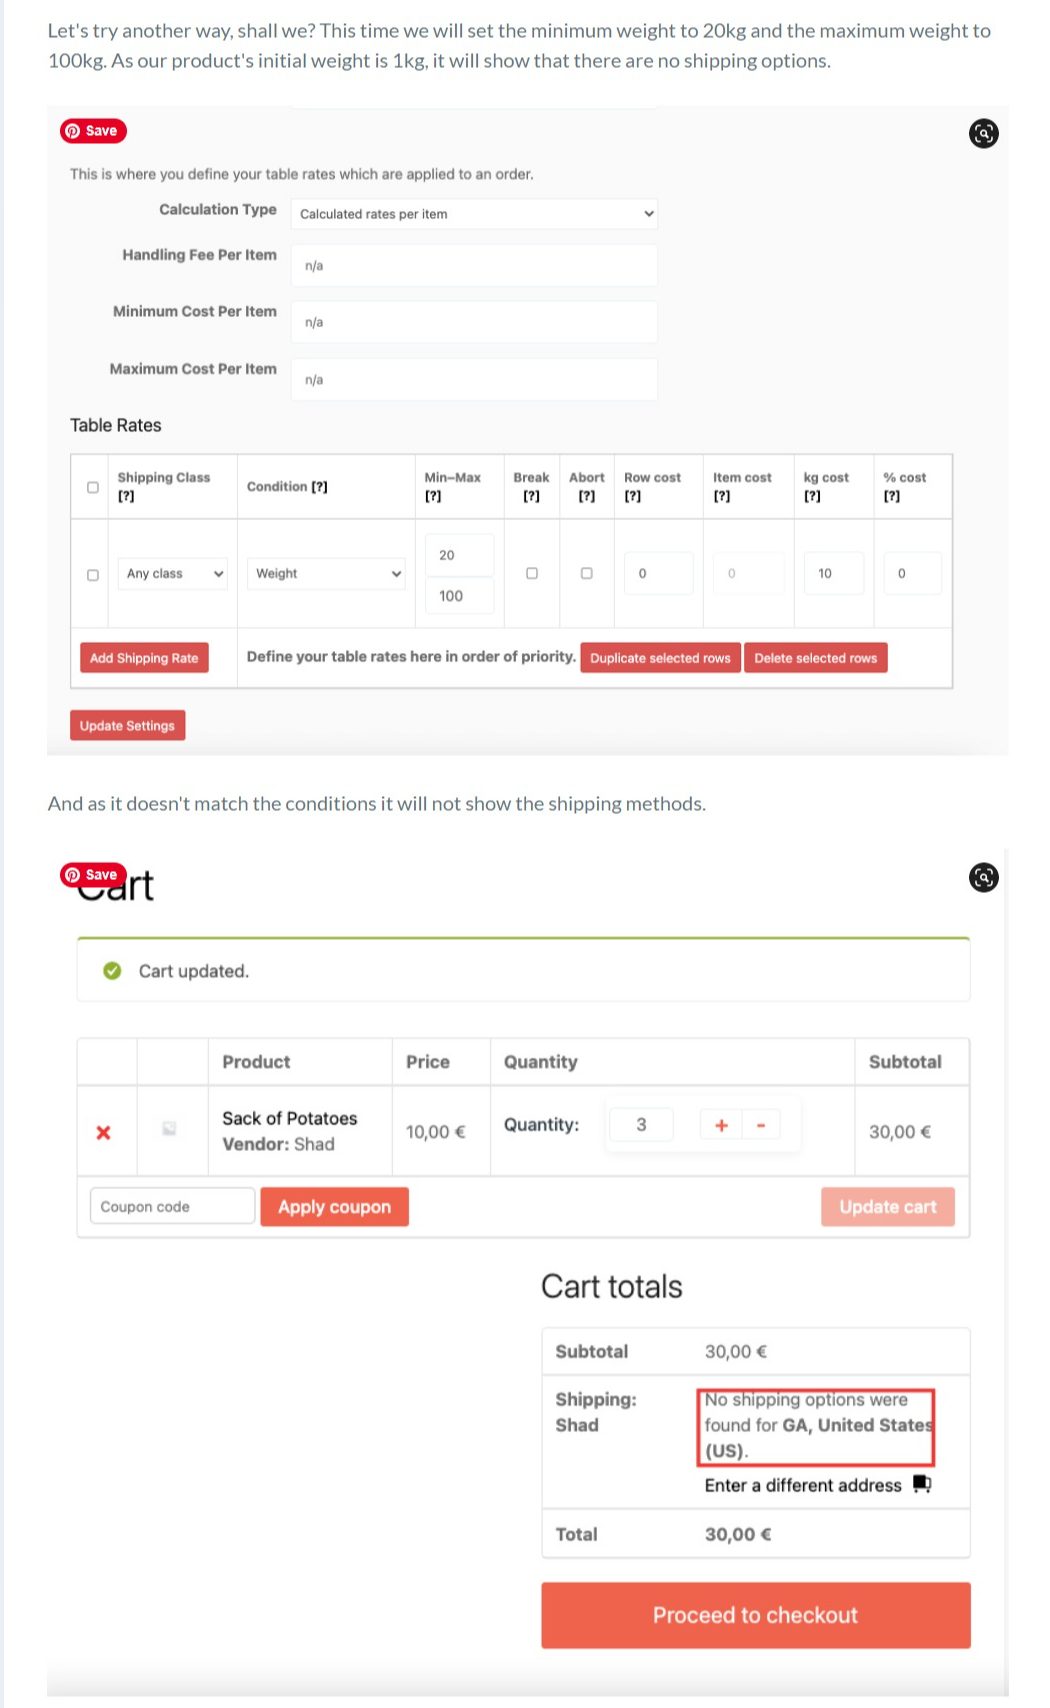
what happens when your item is outside of the shipping settings:
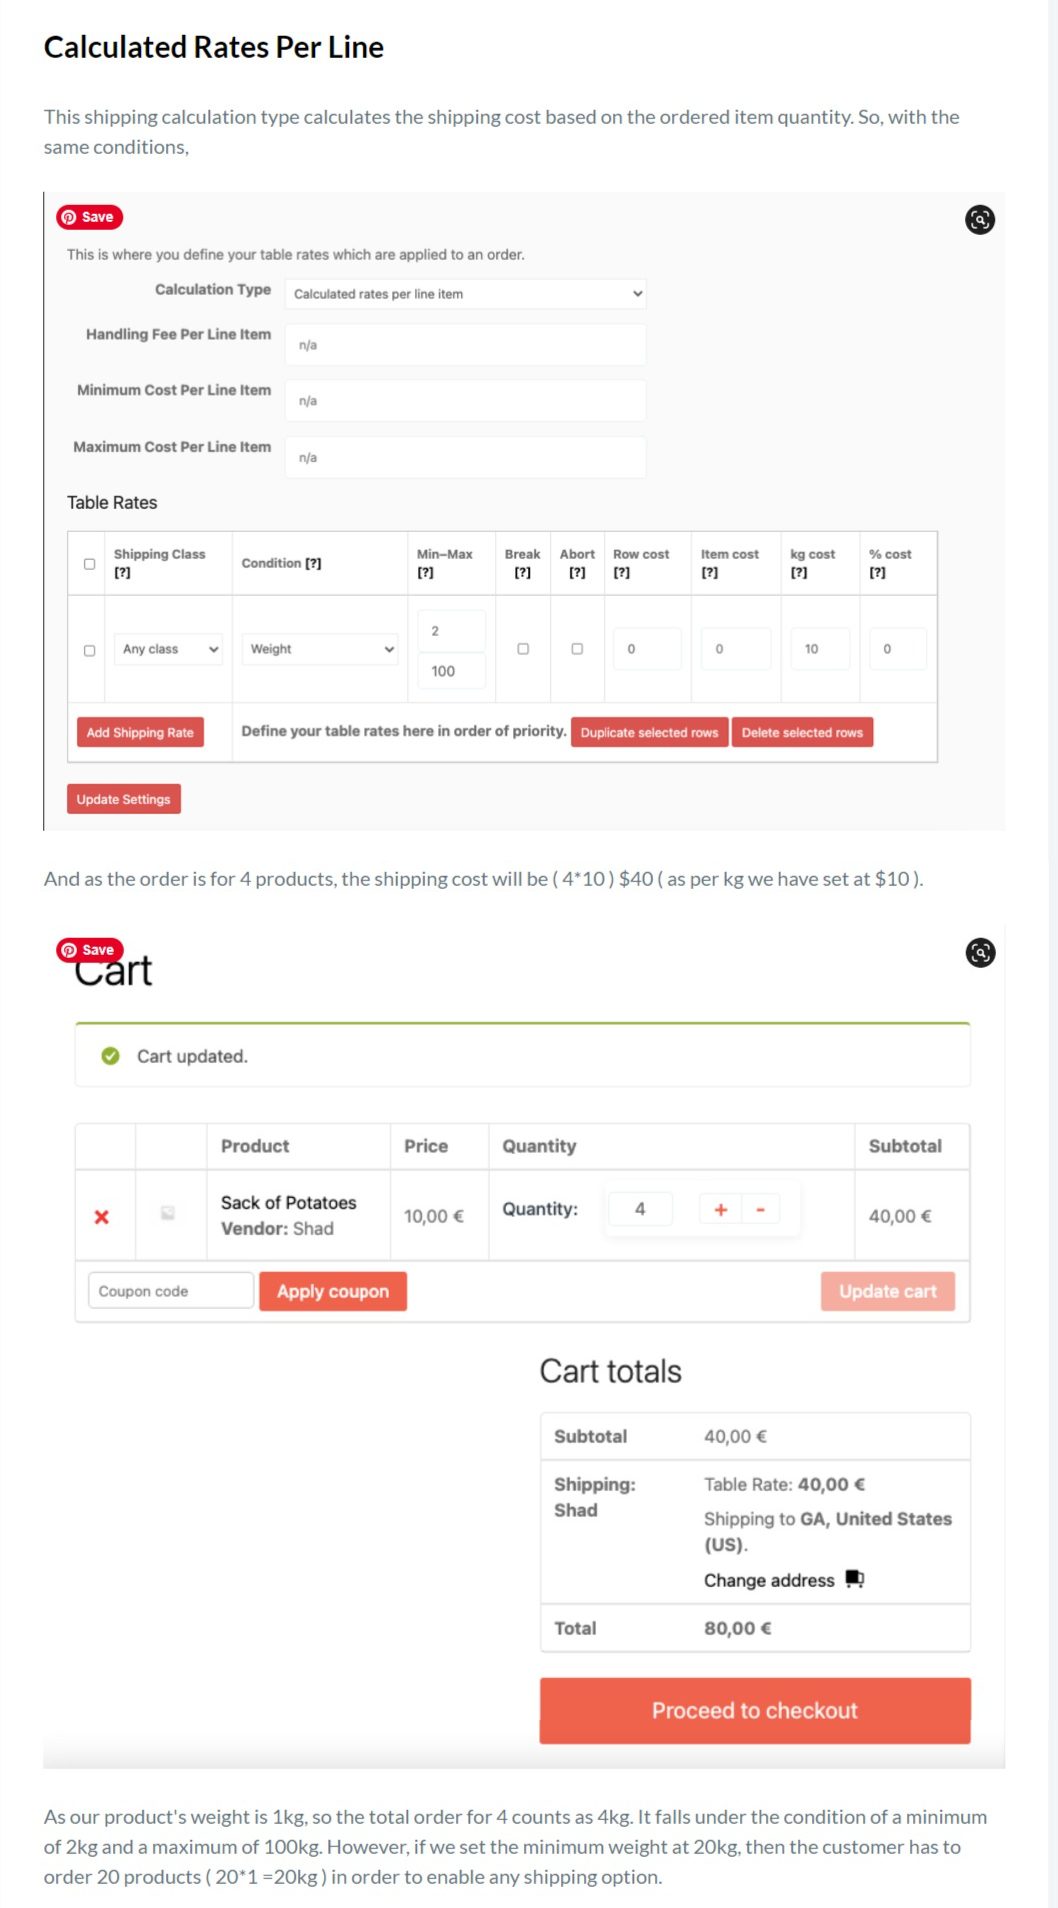
example of ‘per line based’ shipping:
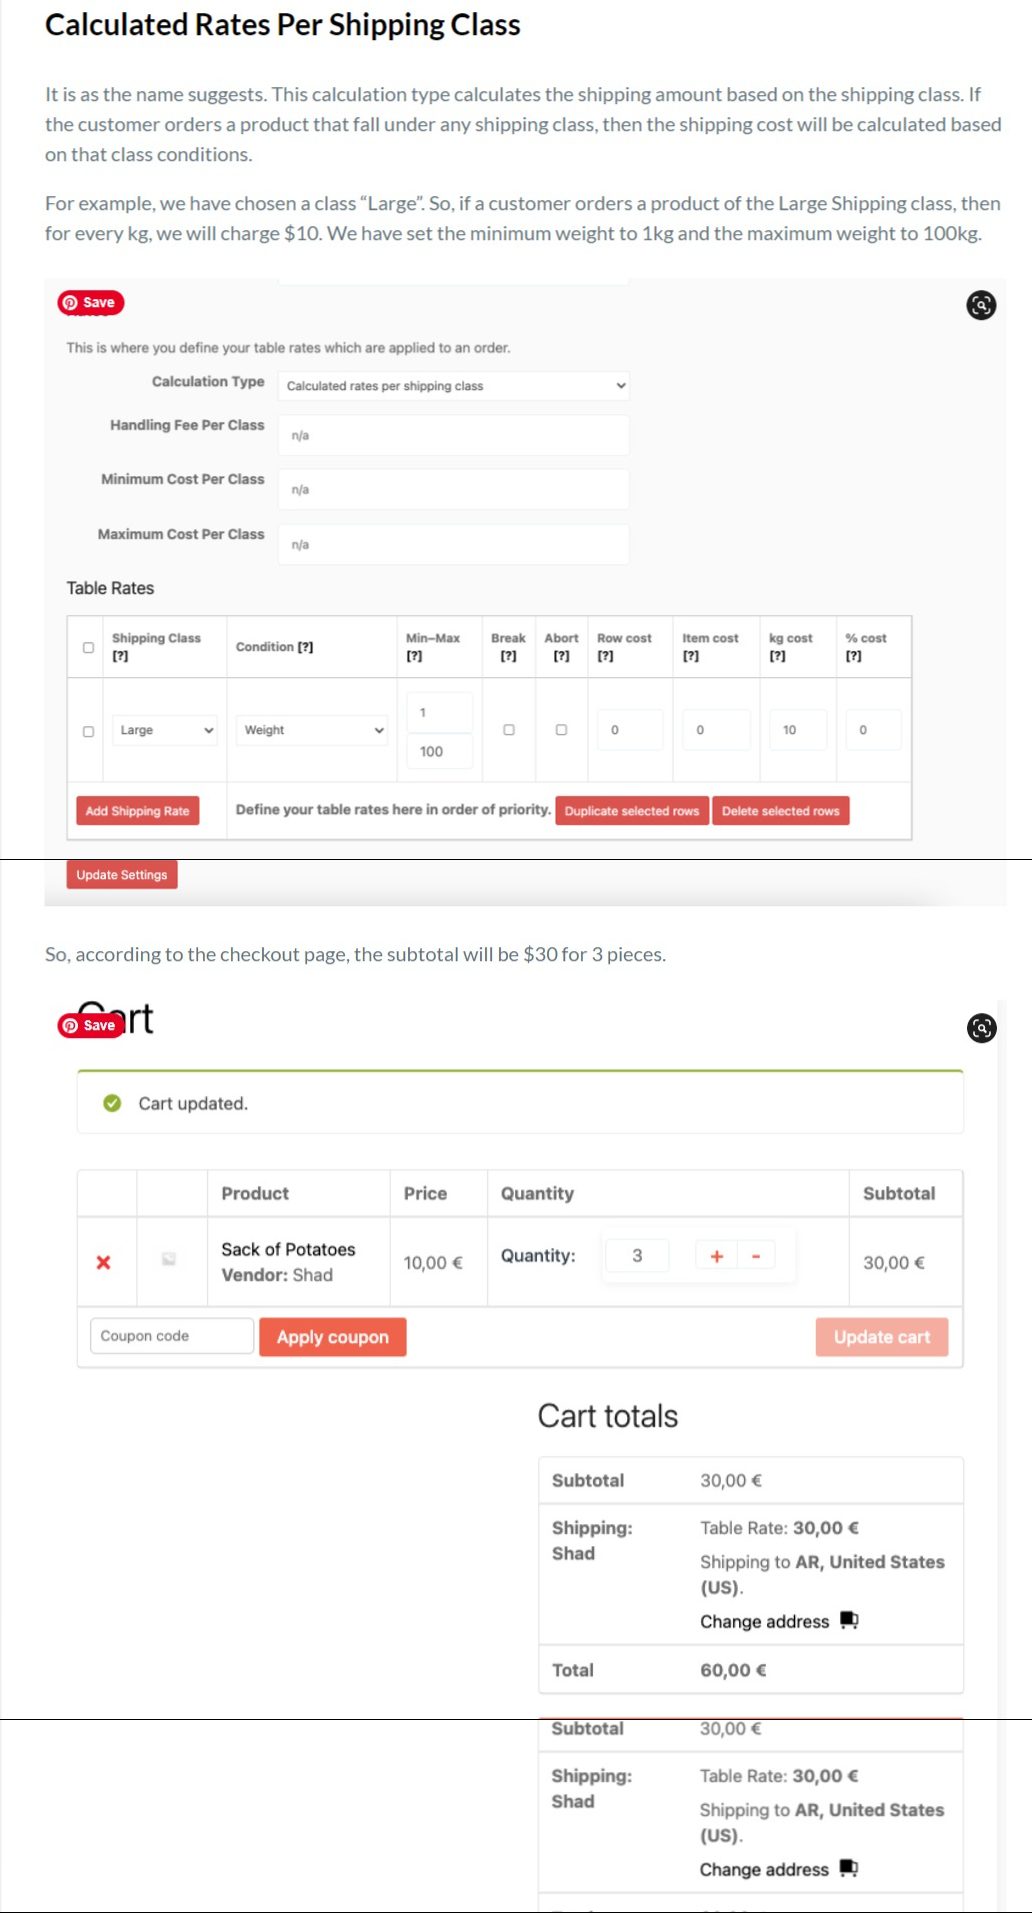
example of ‘per shipping class based’ shipping
ONE LAST THING you can EDIT THE NAME of your table rated shipping and this is how you can set it up for both Rural as well as Residential for example… you can give it a name the customer will recognise.