Especially when one product is offered in different sizes, colours, designs, etc. you will need to be able to add OPTIONS.
Although not technically an ‘option’ we do include message boxes here too – in the case you will need a name or more information of any sort from the customer.
These options can be drop down menus, a list to choose from – you can add extra cost to particular options… you name it.
When setting up The Hive NZ listing options, you have two powerful tools at your disposal: Attributes and Add-ons. While both allow for customization, they serve different purposes.
We recommend using Attributes for most product variations. They offer deeper control and a better experience for both you and your customers.
Visual Appeal: Link specific images to your options (e.g., showing the red fabric when “Red” is selected).
Inventory Management: Set individual stock levels for each variation to prevent overselling.
Versatility: Combine physical and digital items (non-downloadable) within a single listing.
Use Add-ons specifically for customer-generated content. For the best user experience, we suggest limiting Add-ons to the following:
Text Boxes: Ideal for names, dates, or custom messages.
File Uploads: Perfect for customers sending you photos or design briefs.
You can utilize both Add-ons and Attributes in a single listing to maximize functionality, provided they serve different roles.
Example: Imagine you sell custom cushions. You can use Attributes to manage your limited fabric stock (e.g., only two “Linen” options remaining) and use an Add-on text box so the customer can type the name they want embroidered.
💡 Pro-Tip: Mastering Your Inventory
To prevent overselling and keep your shop running smoothly, always use Attributes for items with limited quantities. Because The Hive NZ listing options allow you to set specific stock levels for every variation (like size or color), the system will automatically mark an option as “Out of Stock” the moment it sells out. This saves you from manual updates and keeps your customers happy!
Attributes allow you to do a little more with your options; you can set different stock levels, you can combine physical products and add a digital option, etc
Attributes also hold The Hive’s pre-loaded options; Size and Colour.
You set up attributes WITHIN your listing.
FIRST STEP:
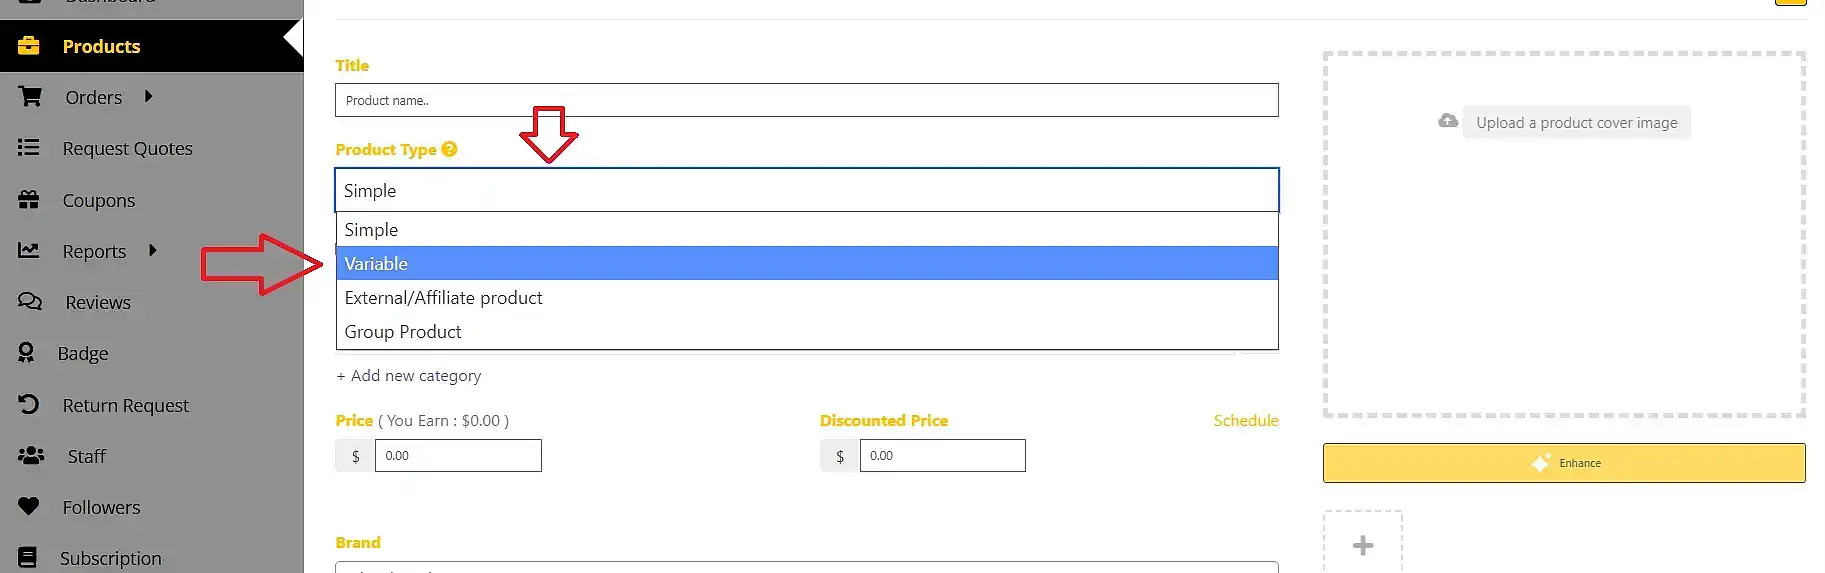
To set up your own attribute – rather than using our pre loaded ones like size and colour – leave it on ‘custom attribute’ and click ADD ATTRIBUTE.
Now you NAME your attribute, tick ‘used for variations’ and add some values by writing and using the | to add another
Then hit SAVE ATTRIBUTE
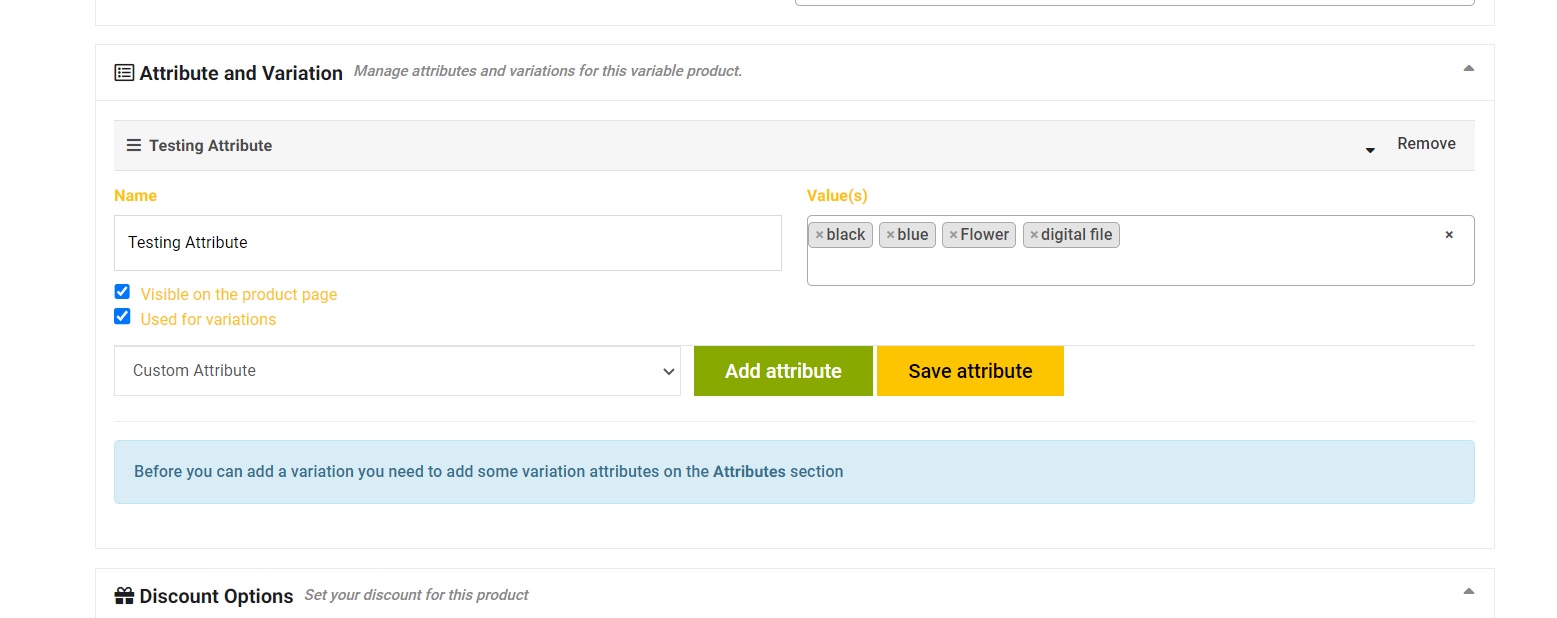
now ‘ADD VARIATION’ is added and click ‘create variations from all attributes’ and click GO (you will get a pop up and you click OK)
EDIT EACH OPTION: this now gives you the opportunity to edit each different option, click right next to each option to open up the edit screen.
here you can now set stock, make this option a virtual option (so no shipping will be charged when chosen), you set the price for the option (always) and you can set a discount price for this option.
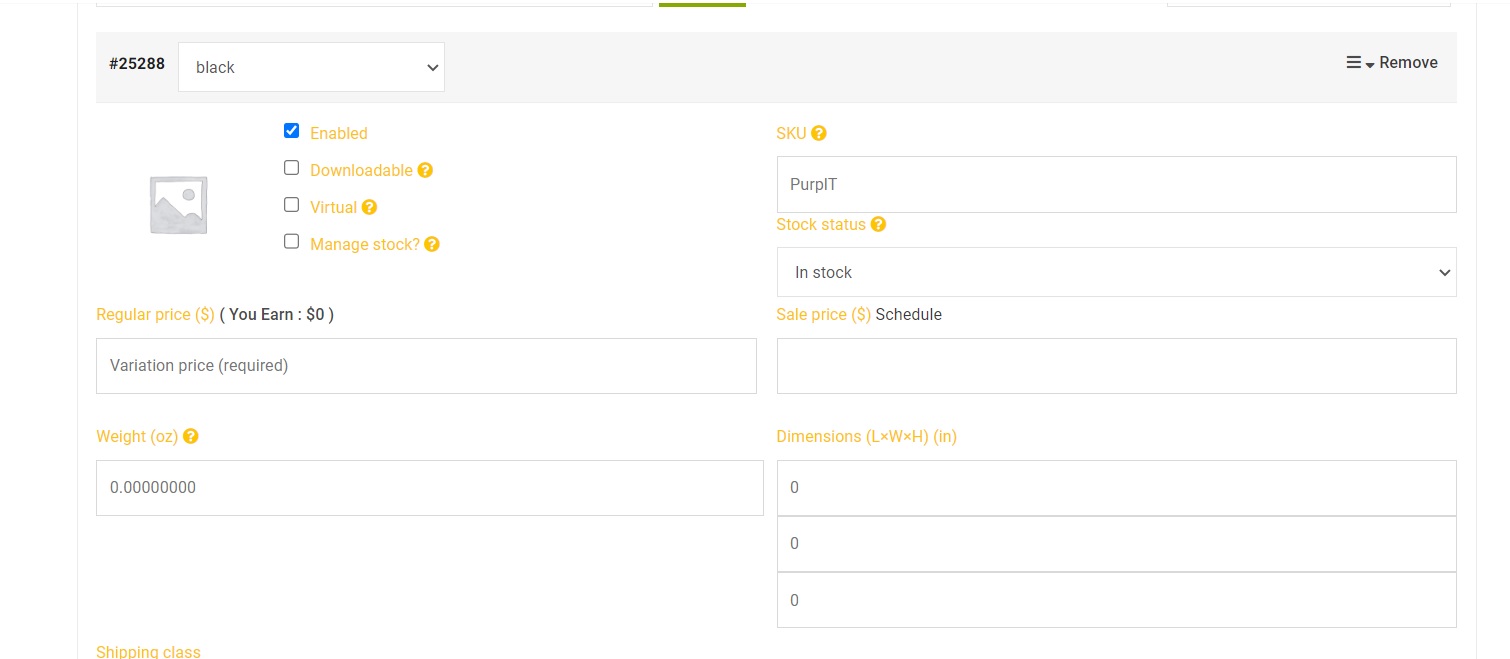
IF you are doing weight based / unit based shipping, then you will need to use the second bit of this to make sure your shipping is charged correctly.
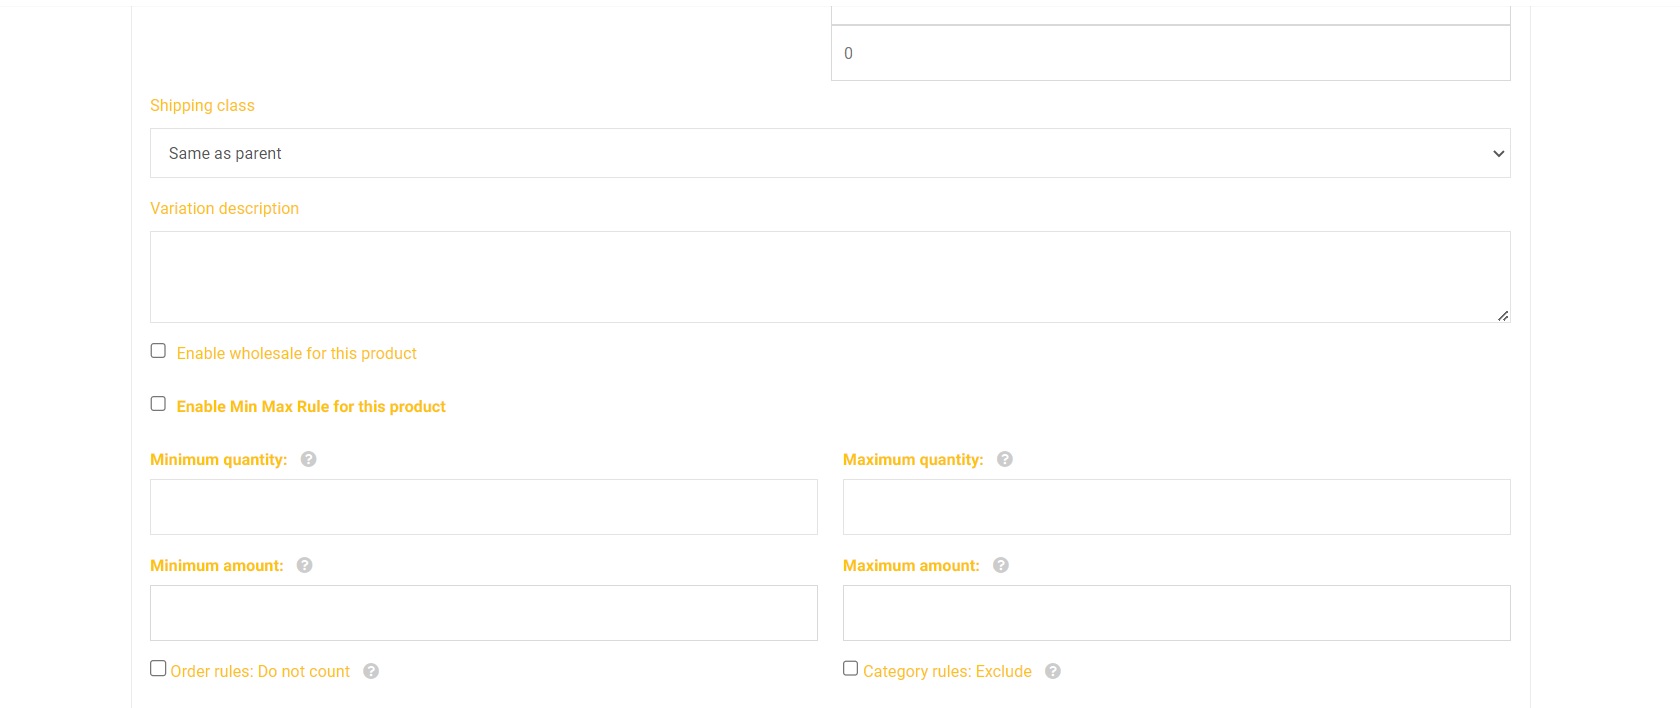
You will need to do the settings for each option and then you need to SAVE
and save your product.
⚠️ Important: Choosing the Right Option
To ensure your shop functions correctly and provides the best customer experience, we strongly recommend using Attributes for almost all product variations.
Please only use Add-ons for the following:
Text Boxes: Where a customer must type a name or custom message.
File Uploads: Where a customer needs to provide a photo or document.
For all other choices—such as sizes, colours, designs, or pricing tiers—Attributes are the superior choice for The Hive NZ listing options. Attributes allow for accurate stock tracking and better visual displays, which helps prevent customer confusion and inventory errors.
TO HAVE ADD-ONS show up on a listing
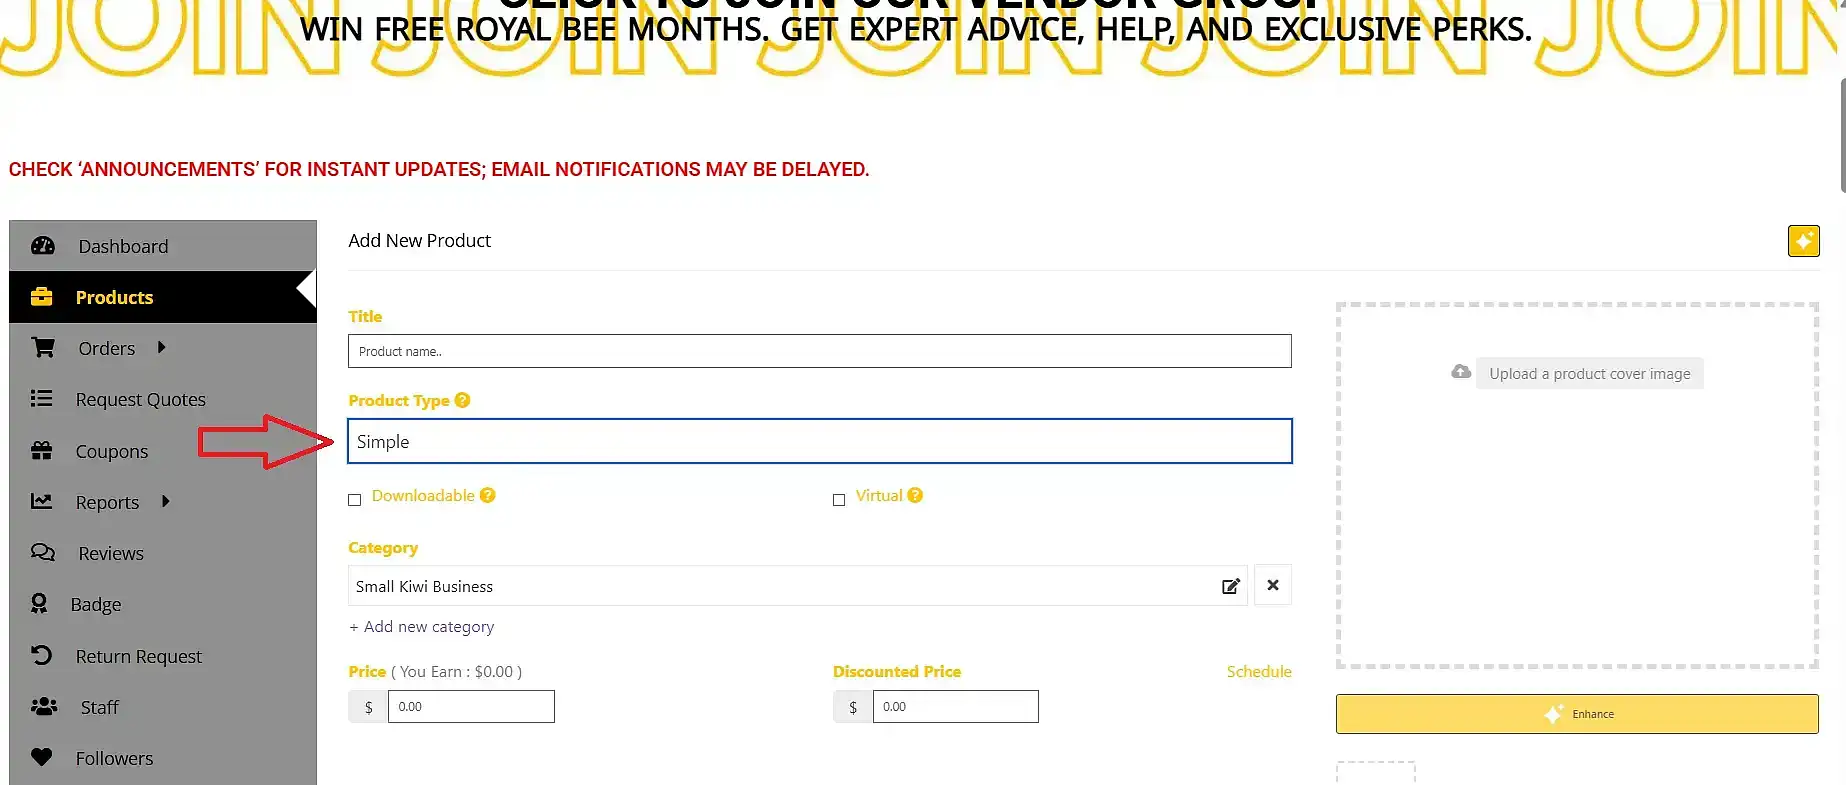
Make sure your listing type is set to ‘simple’.
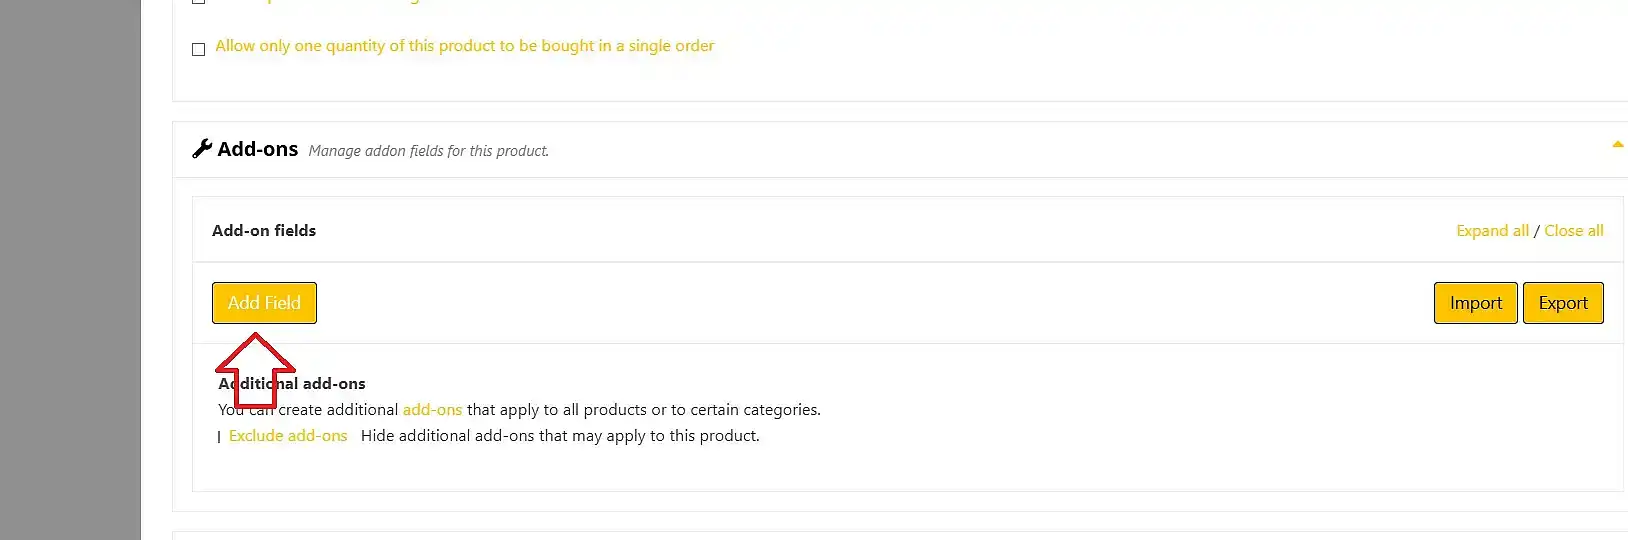
in TYPE please only use either the text or the file upload
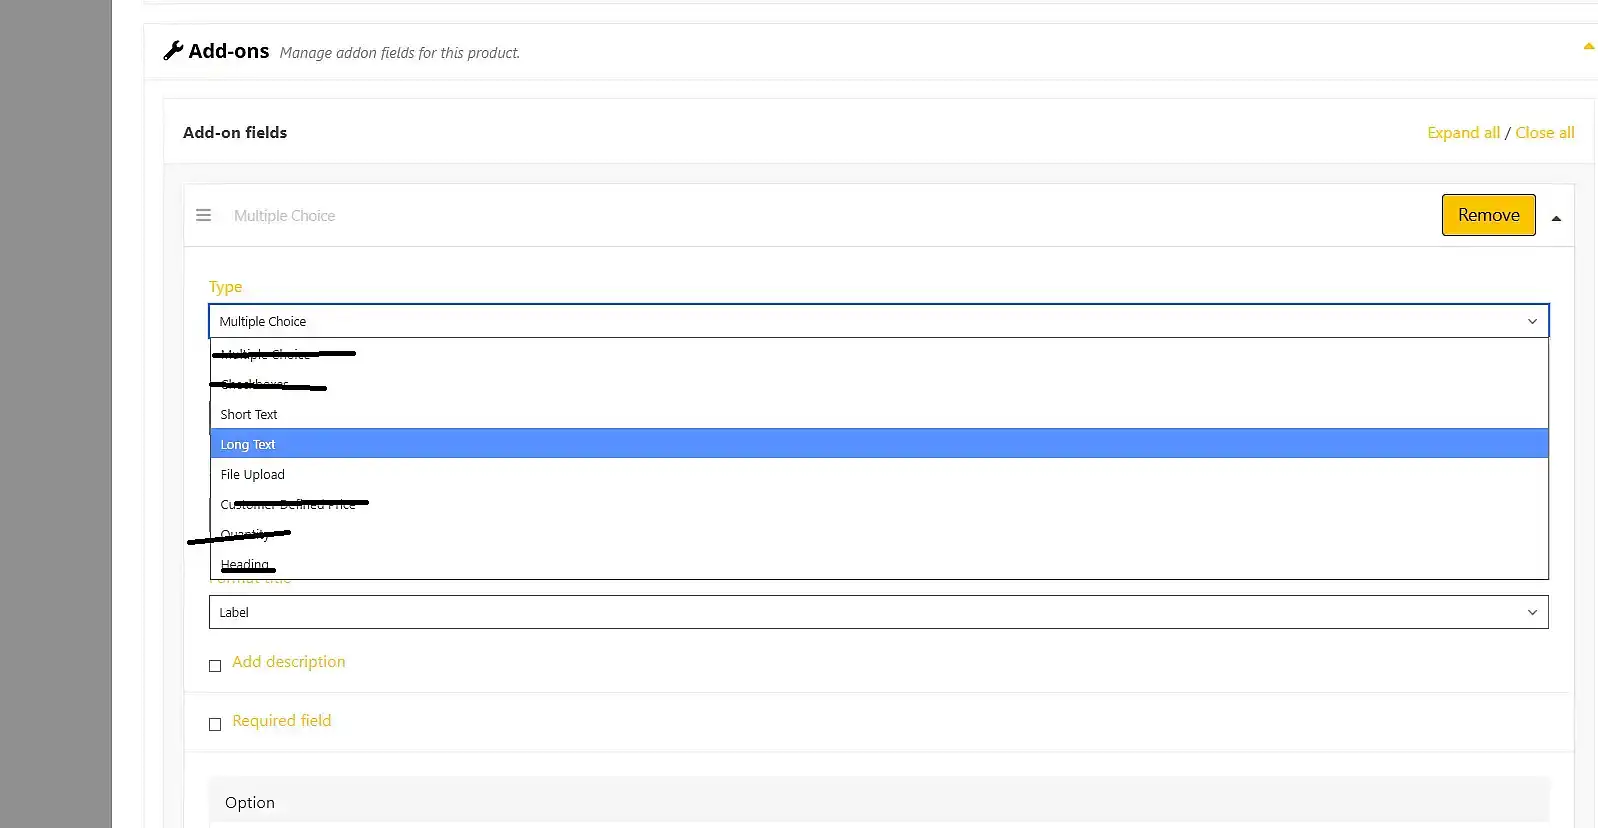
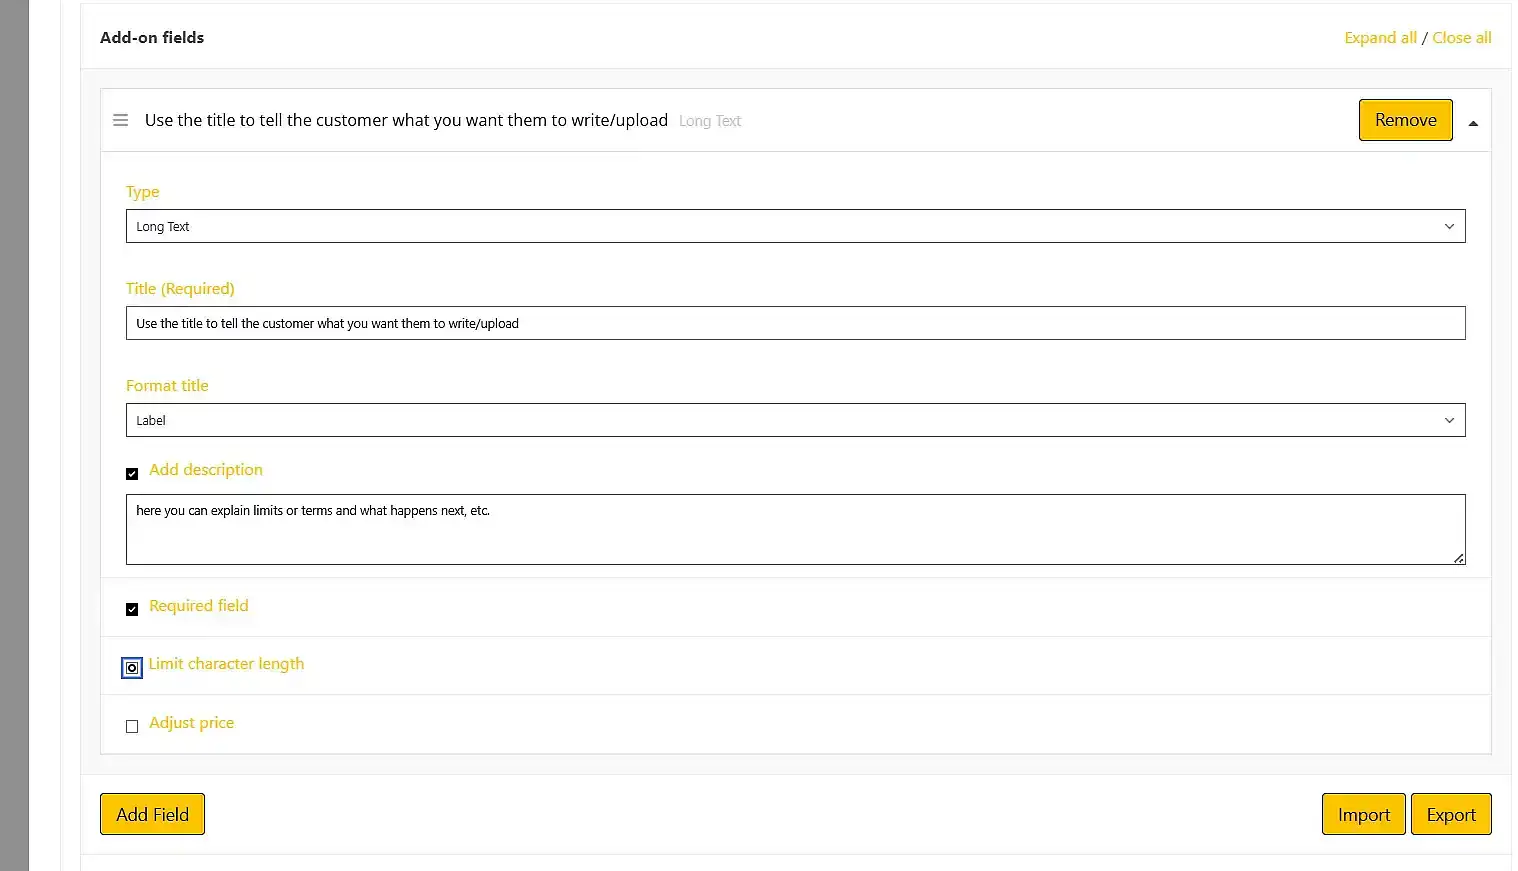
Once you have finished the rest of the listing, make sure you hit SAVE PRODUCT!!
If you have options that should be added to all your listings, then using a group add-on is super easy.
We still only recommend using add-ons for text or file uploads.
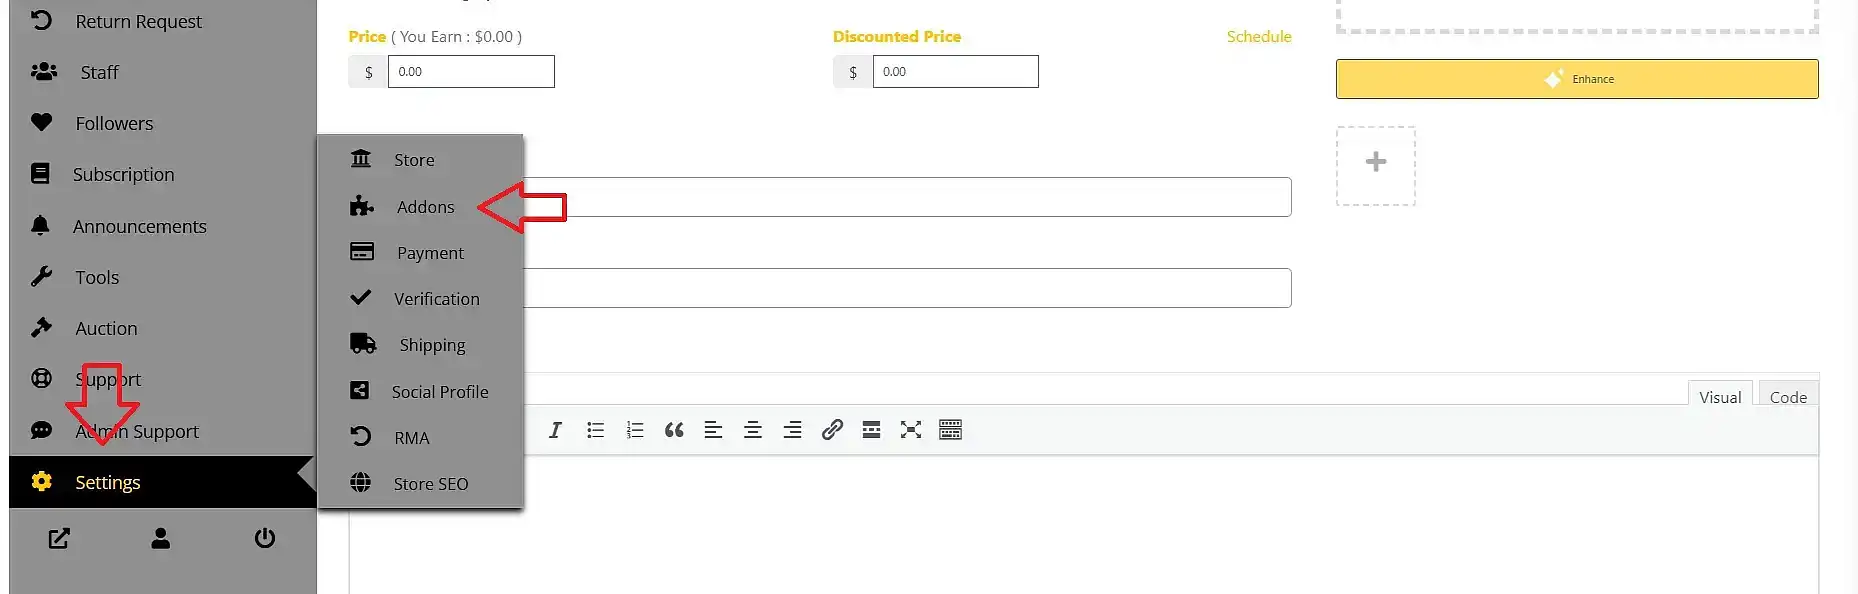
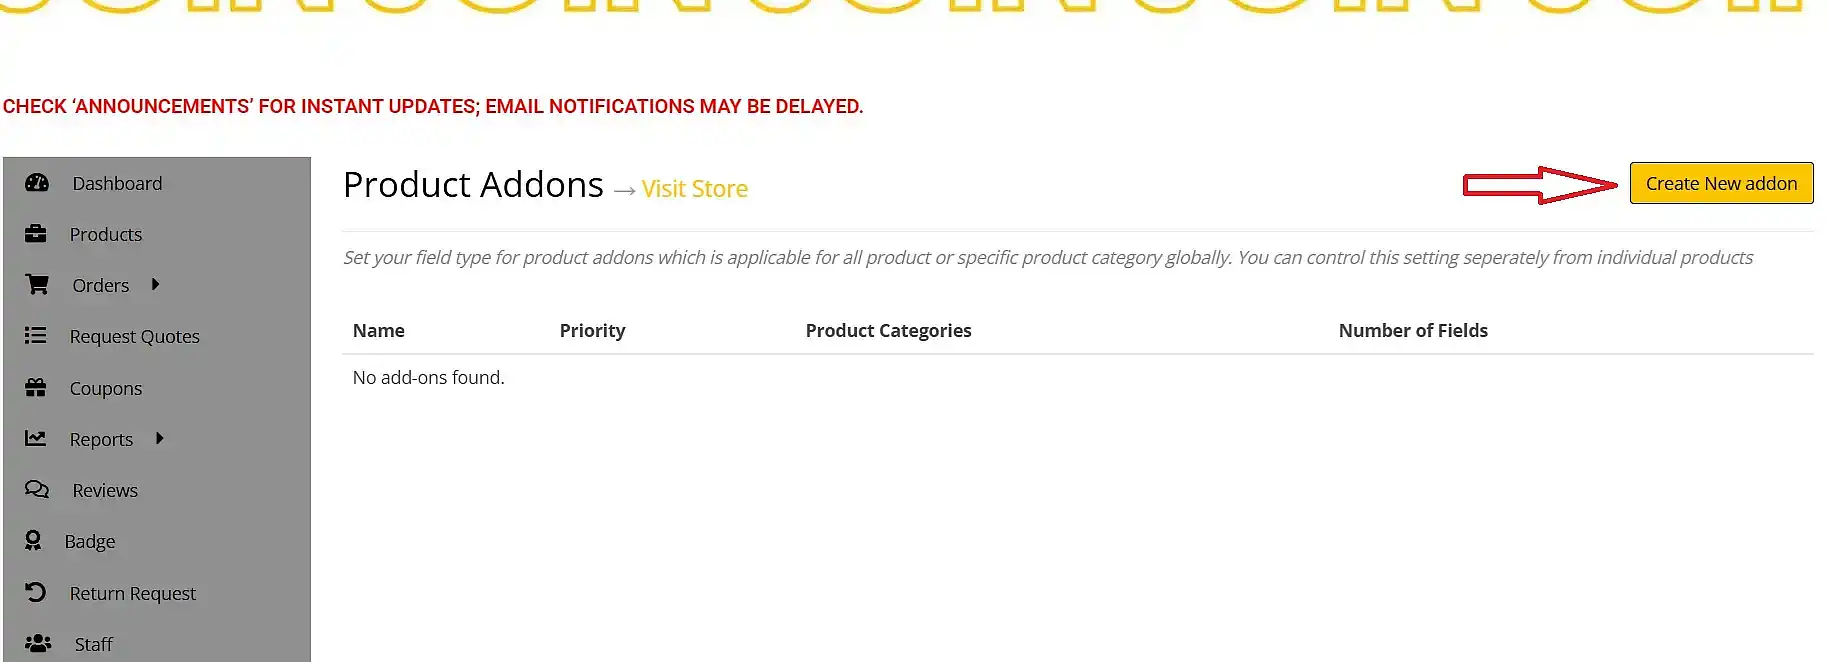
⚠️ WARNING: Managing Group Add-on Assignments
When creating a Group Add-on, you must choose between assigning it to “All Products” or selecting specific product categories.
Before you save, please note:
If you assign an Add-on to an entire category, it will appear on every product (of yours) within that category.
If you have a specific product that belongs in that category but should not have the Add-on, you will encounter display issues.
We recommend checking your category-wide The Hive NZ listing options carefully. If only a few items in a category require an Add-on, it is much safer to apply the Add-on to those specific products individually rather than using the “Group” feature.
✅ Pro-Tip: Overriding Group Add-ons
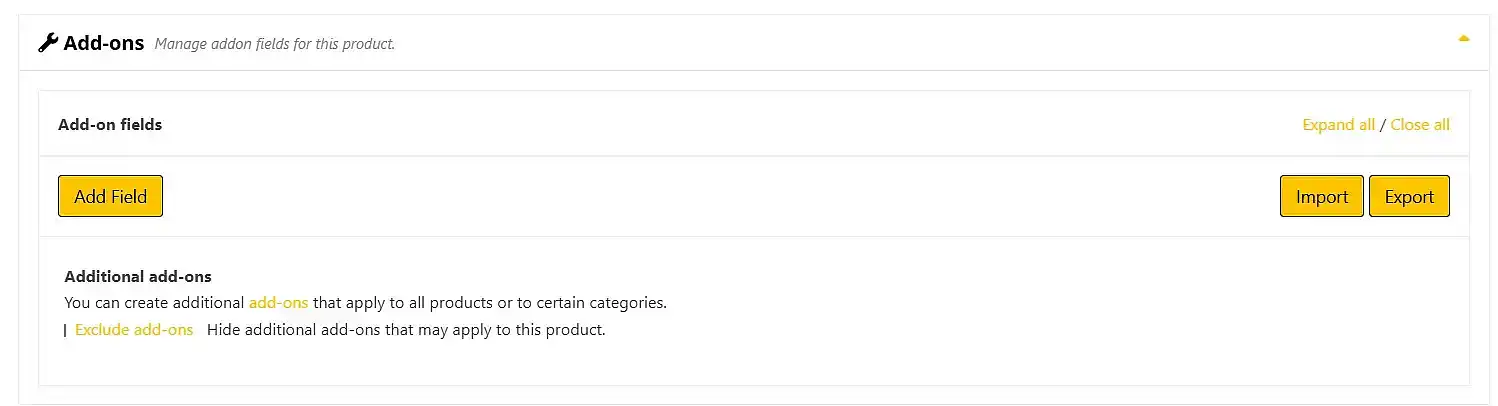
Did you know you can completely disable Group Add-ons for a specific product? Within your individual product settings, you will find a single on/off tick box to control this as shown at the bottom of this guide.
Important Note: This setting is all-or-nothing. If you have multiple Group Add-ons active for a category, you cannot pick and choose which ones to hide. Ticking this box will turn off all Group Add-ons for that specific listing.
If you only want some of your group options to appear, we recommend creating those as individual product Add-ons instead of using the Group feature.
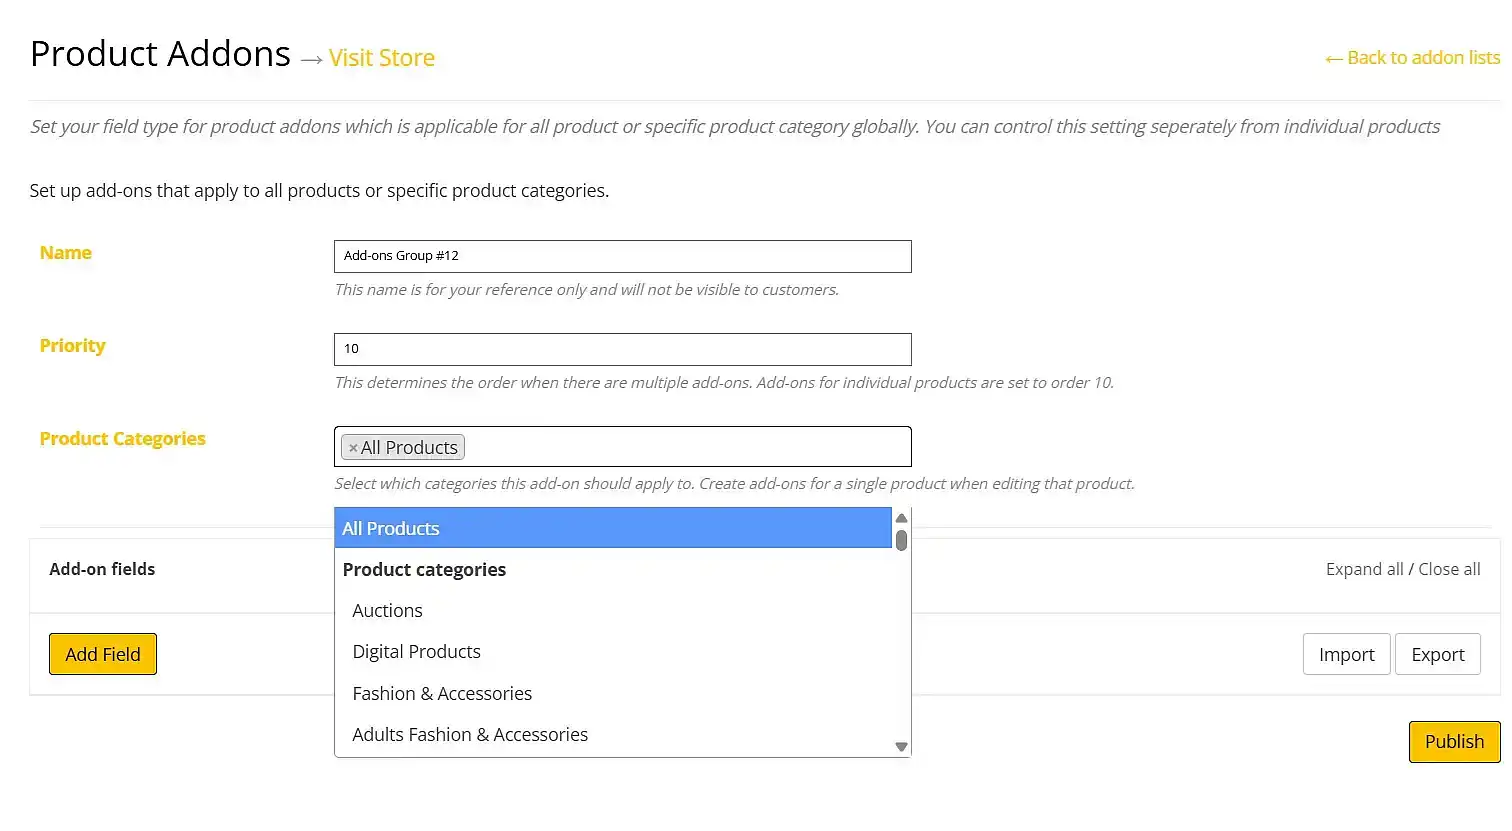
in TYPE please only use either the text or the file upload
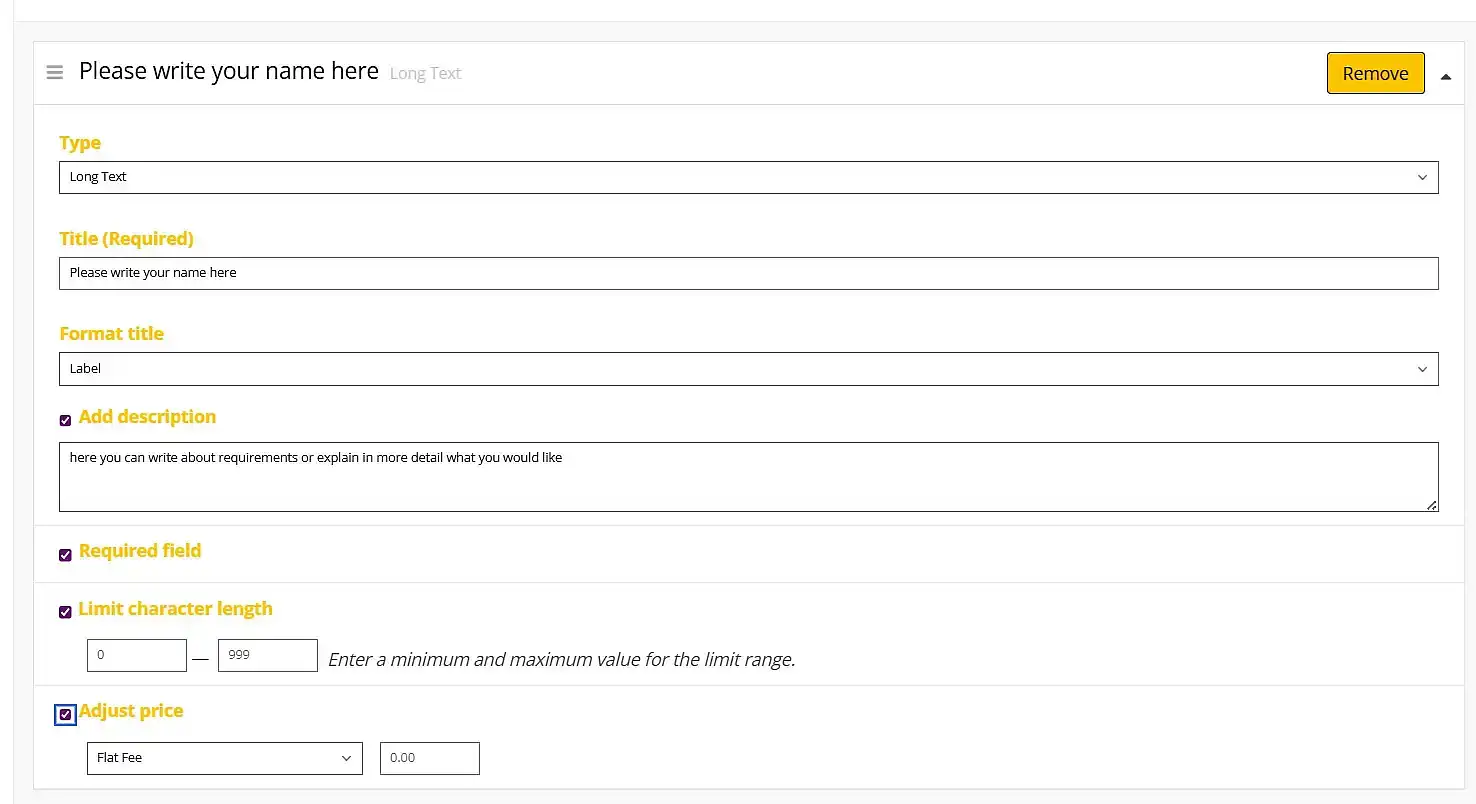
OVERRIDING A GROUP ADD-ON WITHIN A LISTING
As mentioned above, it is possible to completely disable Group Add-ons for a specific product.
Within your individual product settings, you will find a single on/off tick box to control this as shown below.
Important Note: This setting is all-or-nothing. If you have multiple Group Add-ons active for a category, you cannot pick and choose which ones to hide. Ticking this box will turn off all Group Add-ons for that specific listing.
If you only want some of your group options to appear, we recommend creating those as individual product Add-ons instead of using the Group feature.
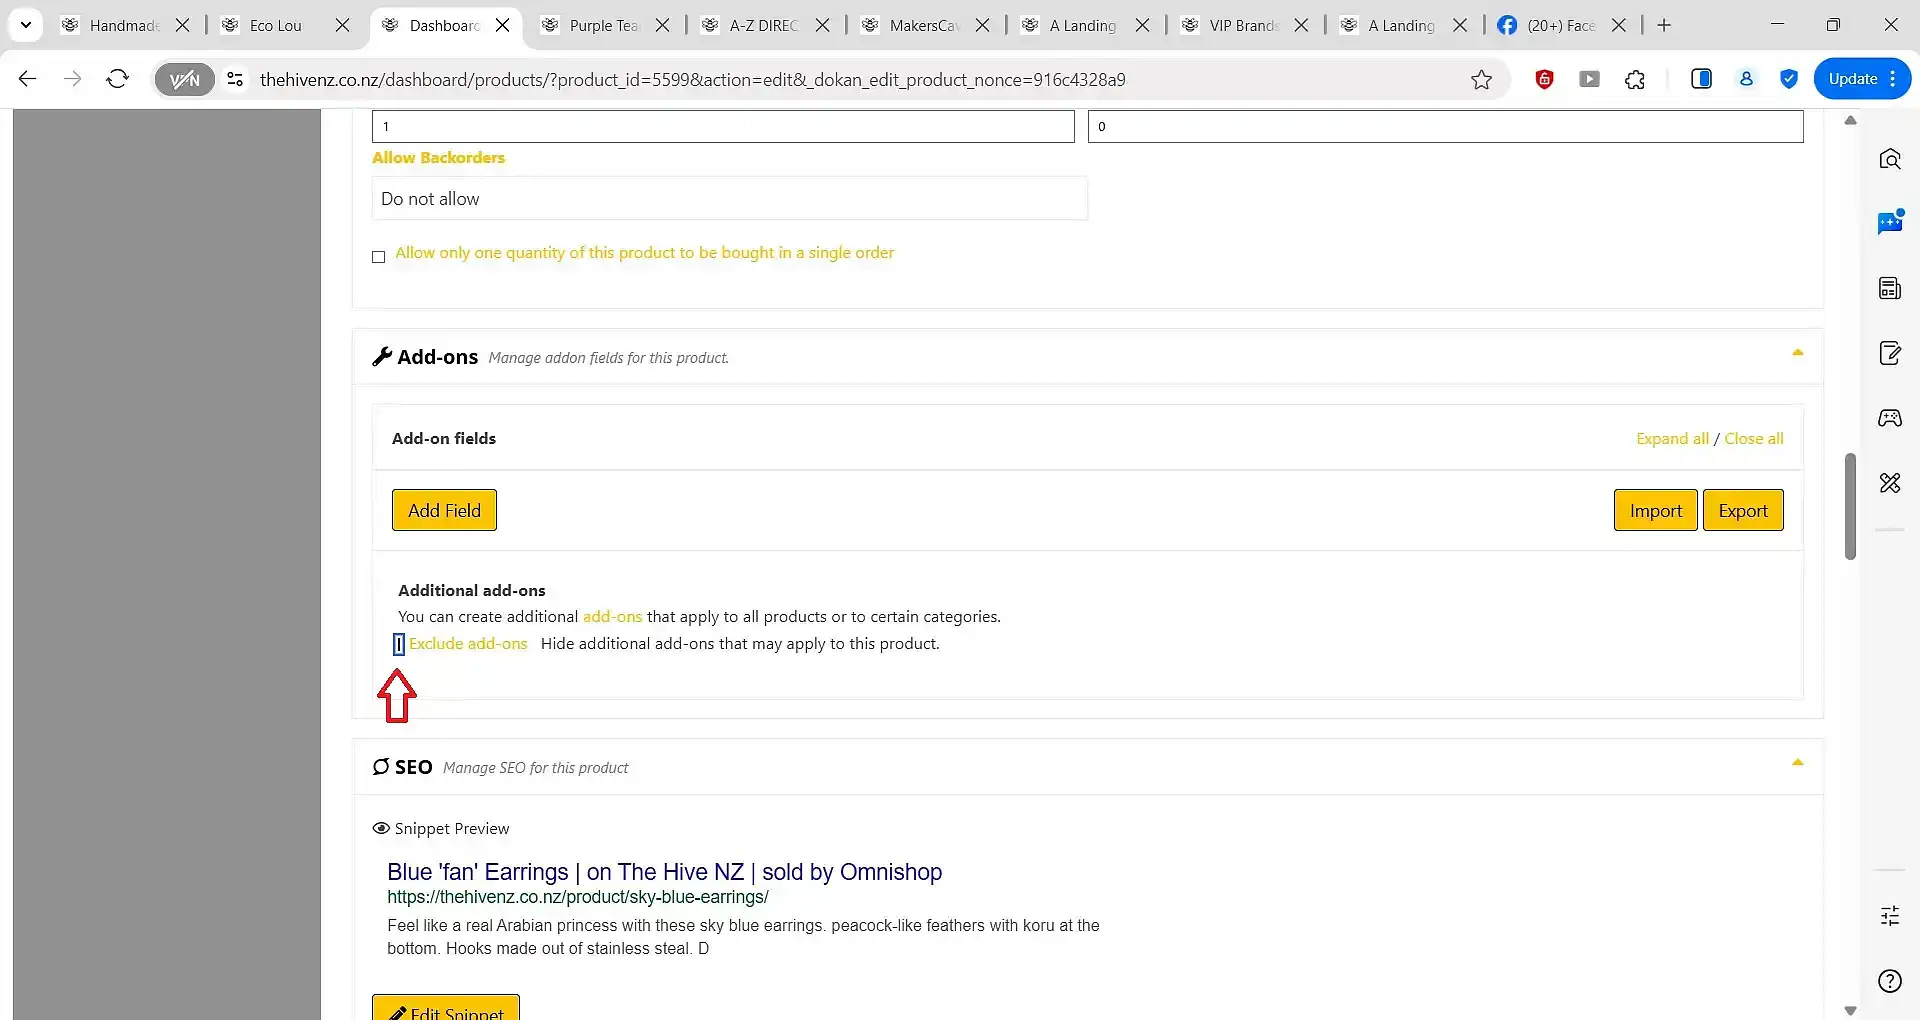
Don’t forget to SAVE PRODUCT!!